Issue a Credential Manually
You can issue a credential straight from the UI to verify a credential template end-to-end without involving your backend.
Open the Issue tab
- Go to Settings → Templates (under Issuer).
- Open the issuer template that contains the credential template you want to use.
- Switch to the Credential templates tab and open the credential template.
- Select the Issue tab.
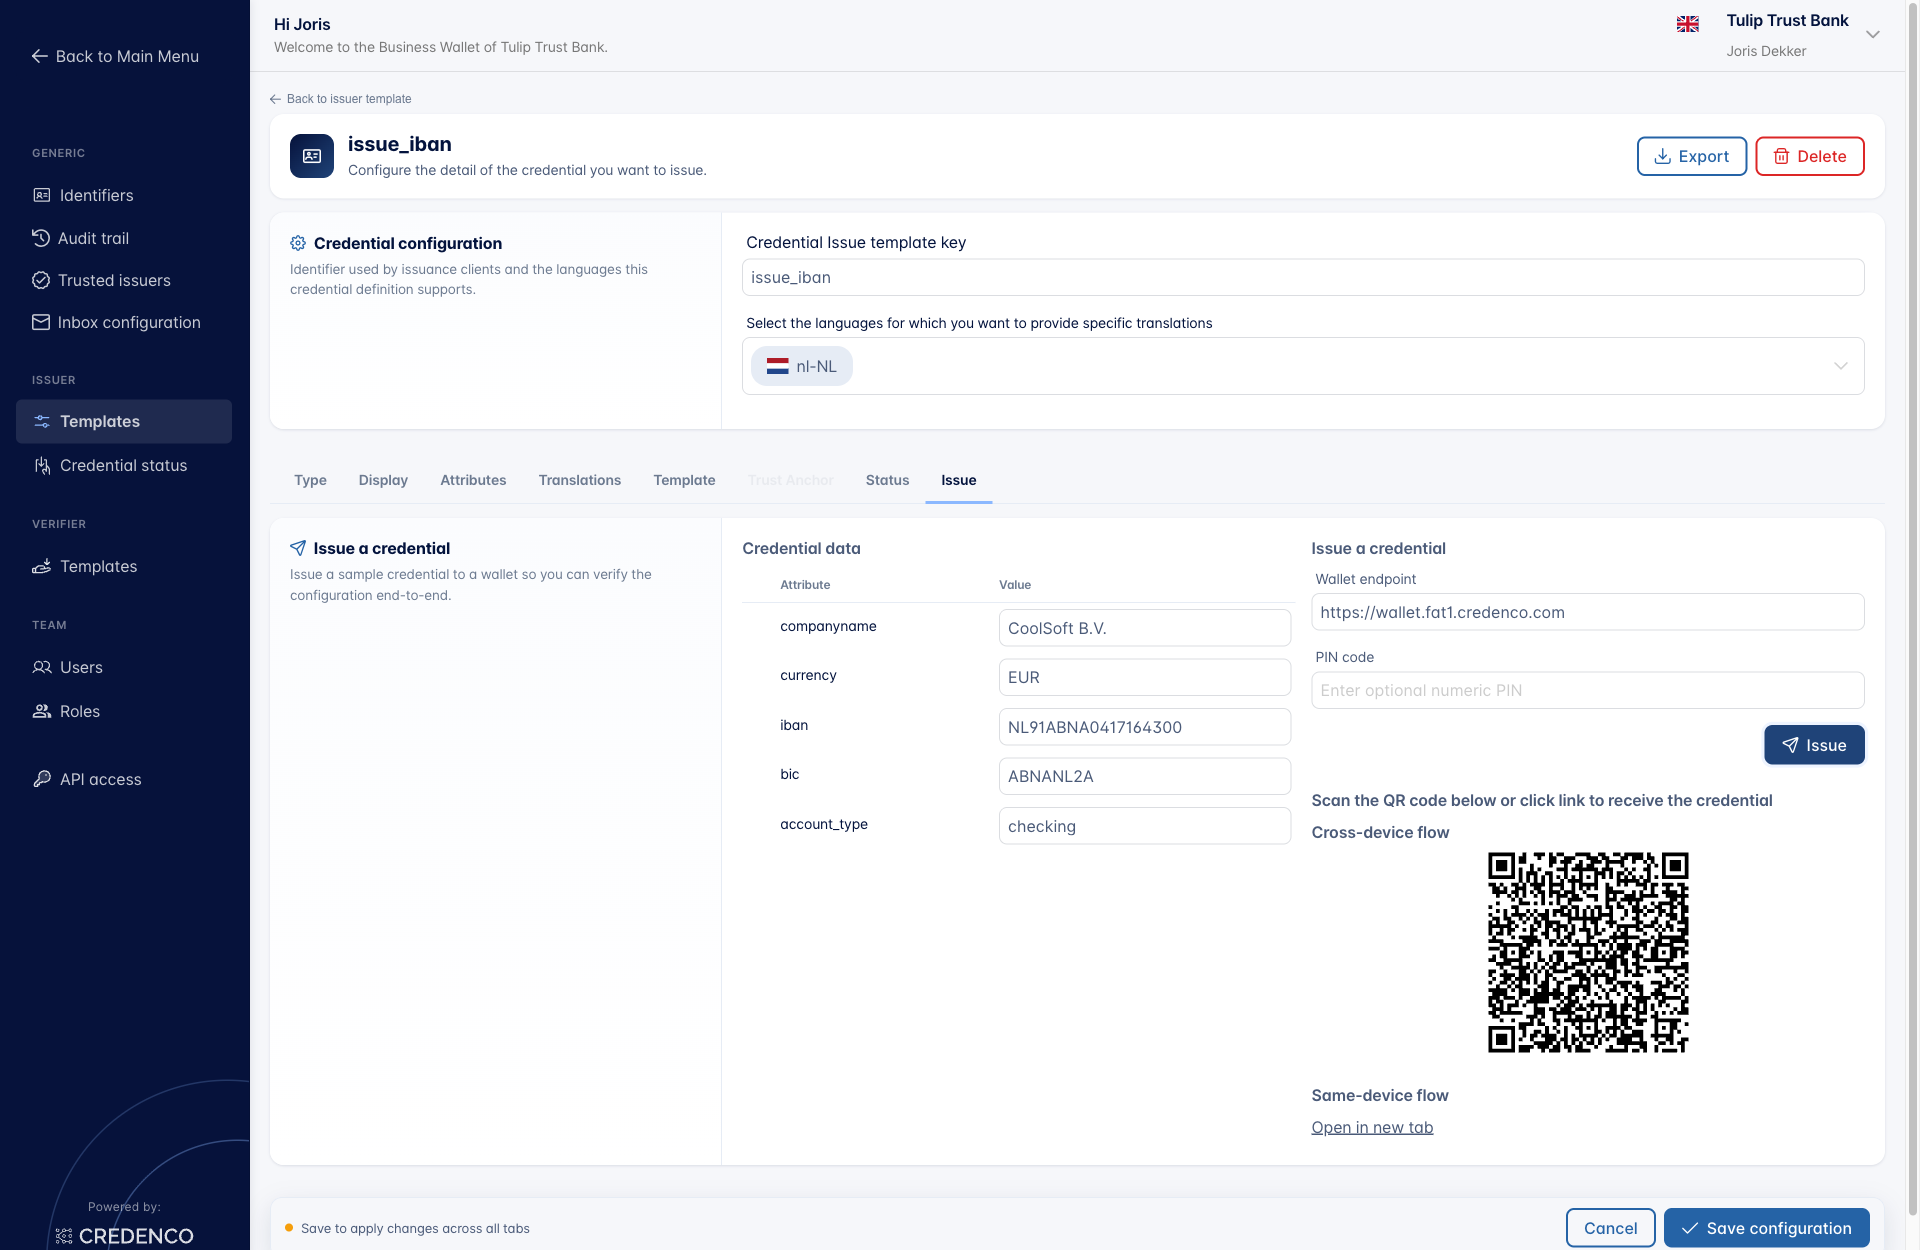
Fill in the credential data
The Credential data panel lists every attribute defined on the Attributes tab. Enter a value for each attribute that should be included in the credential.
Issue to a wallet
The Issue a credential panel on the right controls where the credential is delivered.
- Wallet endpoint — The URL of the web wallet that should receive the credential. Required when issuing to a web wallet.
- PIN code (optional) — A numeric PIN that the wallet user must enter to accept the credential.
Click Issue to start the issuance flow.
Issue to a web wallet
When a wallet endpoint is provided, a link is generated that opens the receiving wallet. Open the link, then accept the credential in the wallet.

After acceptance the credential is stored in that wallet.
Issue to a personal wallet
When no wallet endpoint is provided, a QR code is shown. Scan the QR code with the personal wallet app to receive the credential.
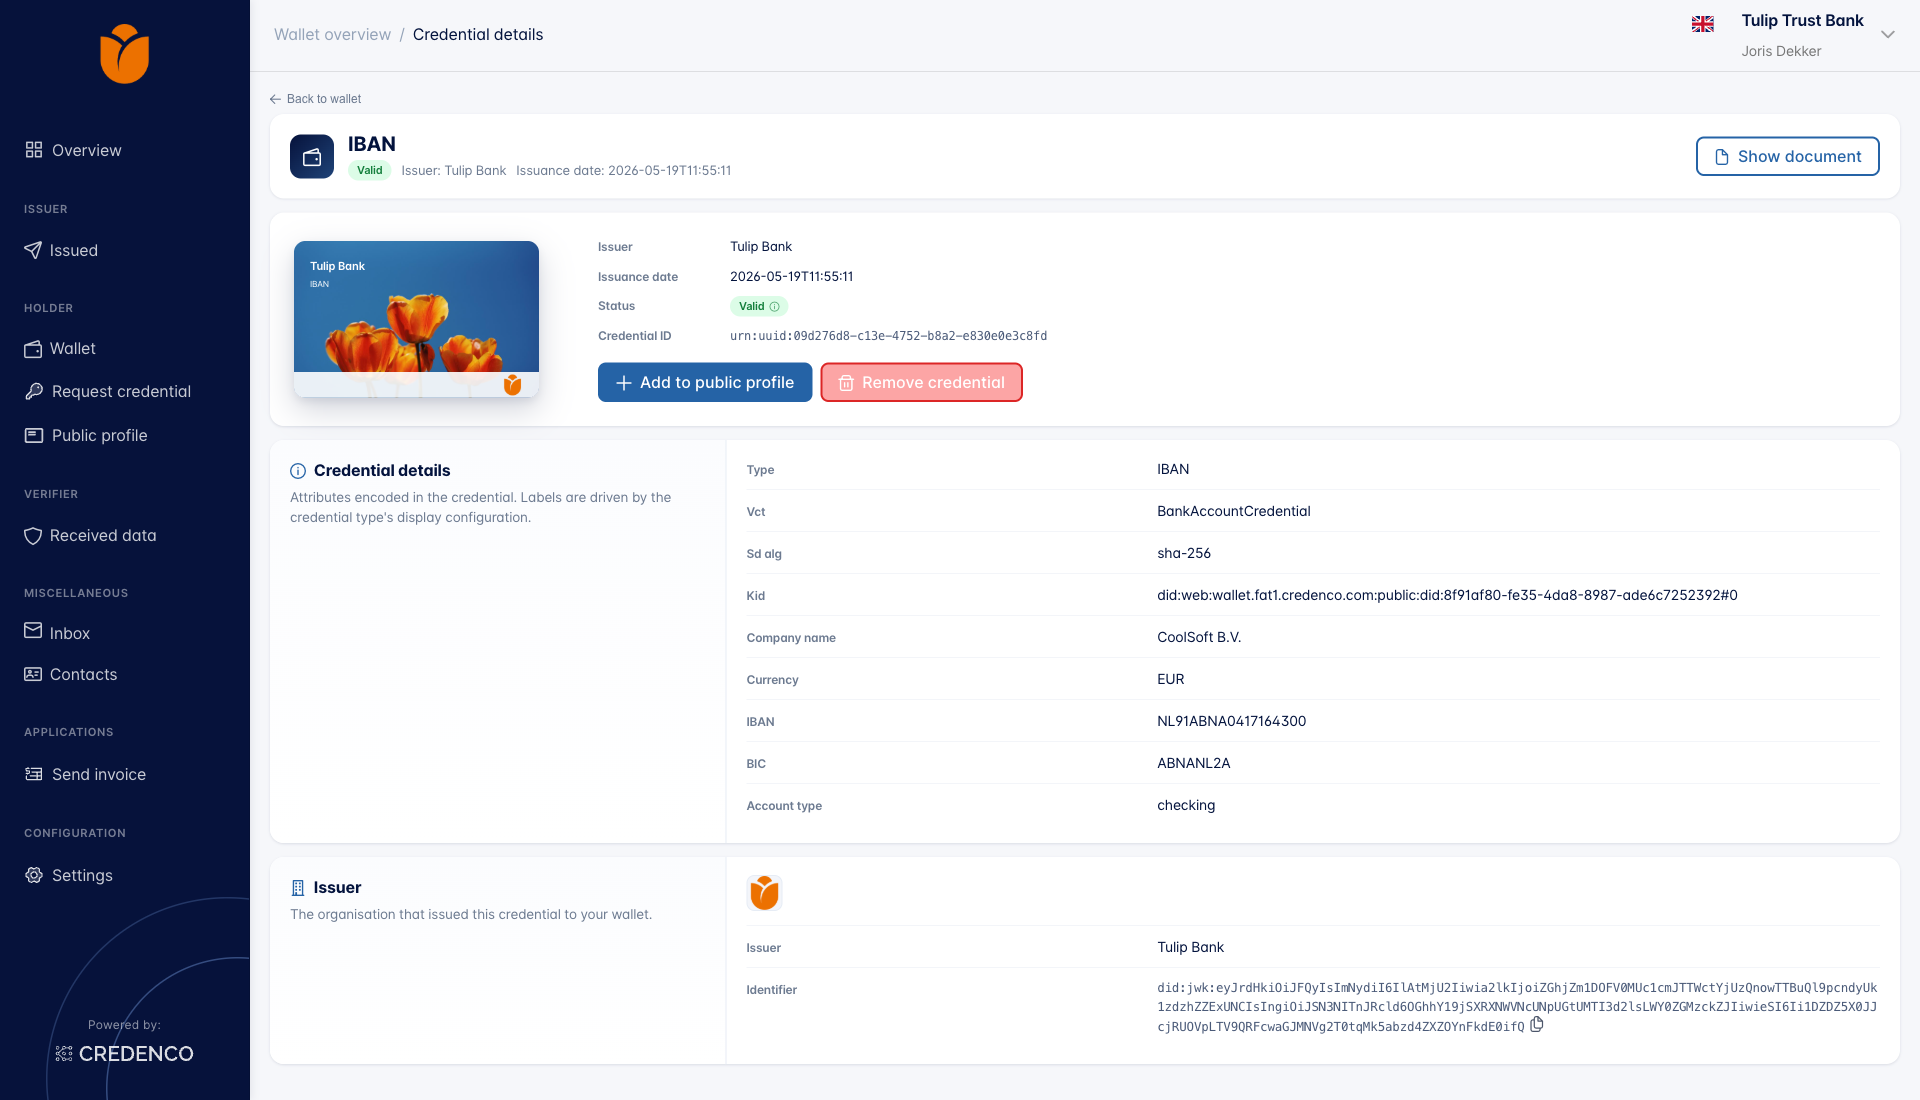
View the credential after issuance
To see credentials stored in your wallet, go to Holder → Wallet in the main menu.
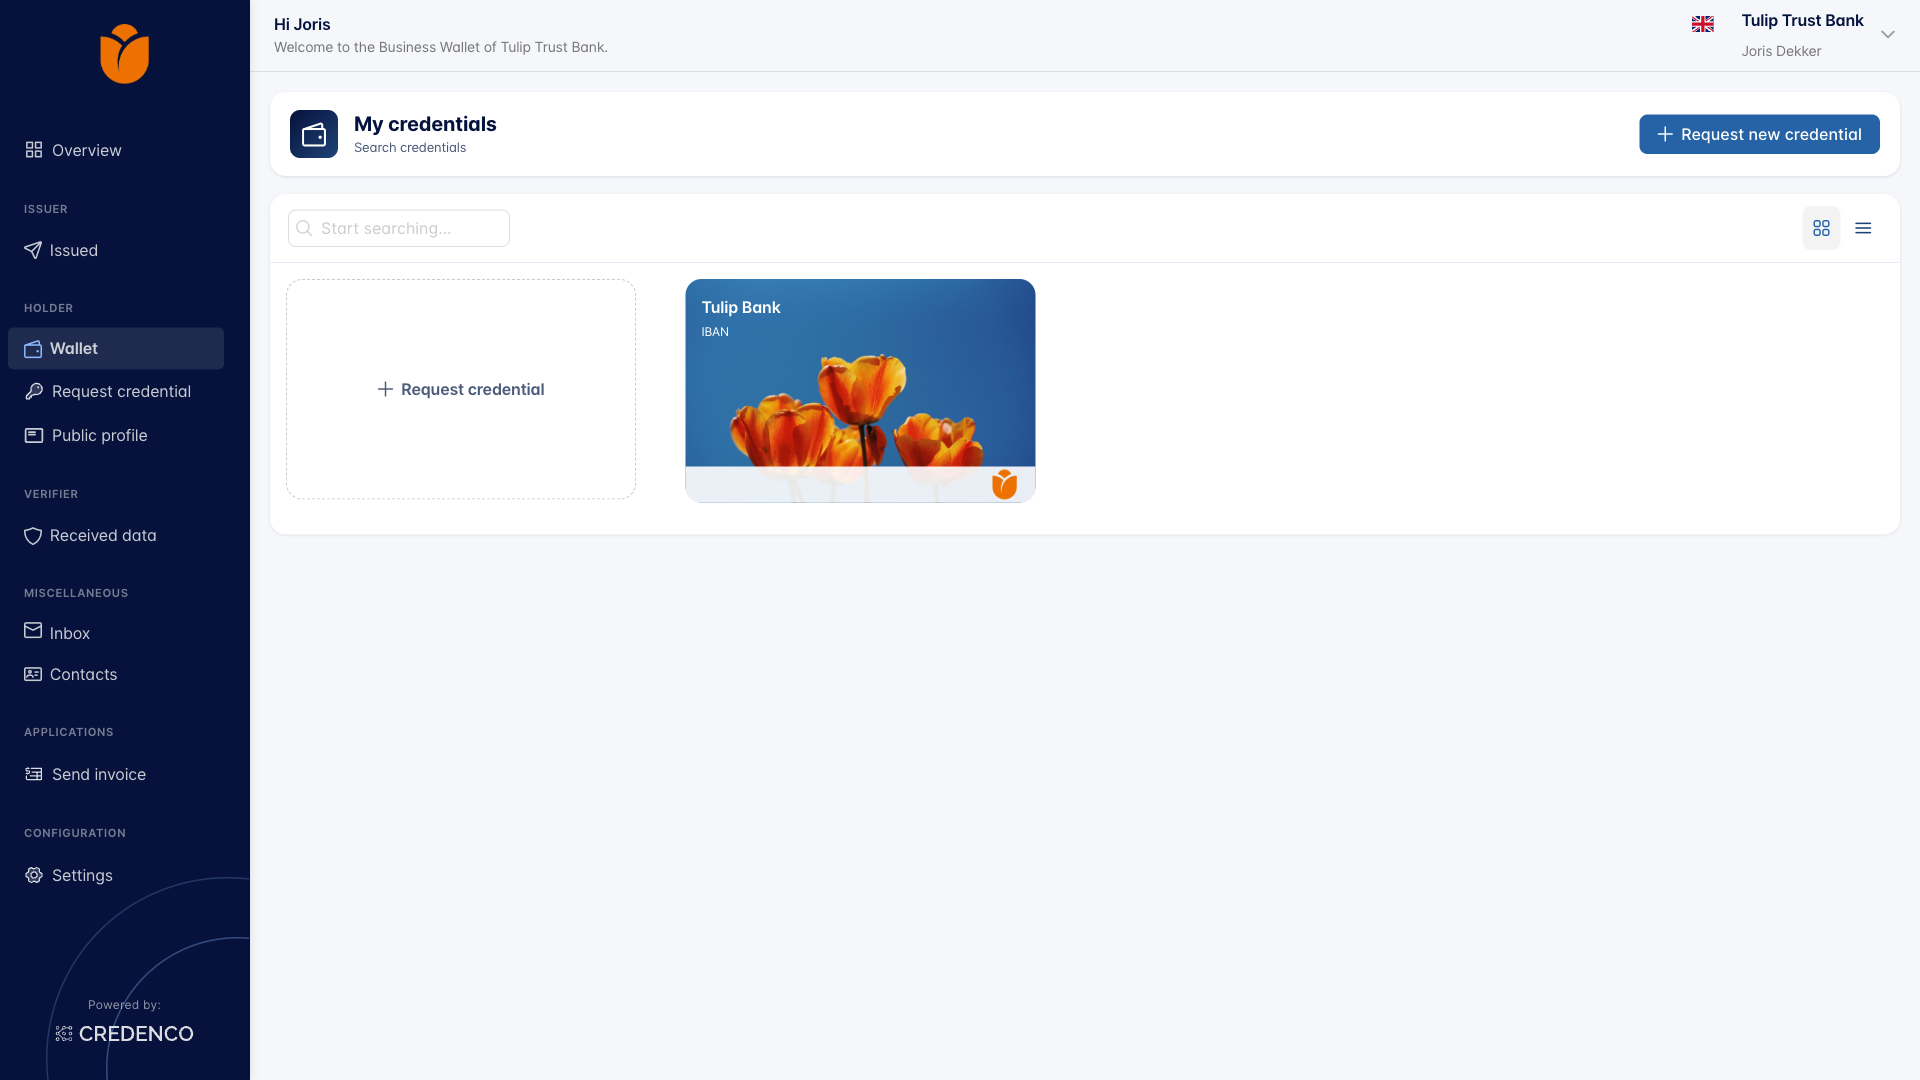
Click any credential card to view its details.
You need the Issue credentials (Change) permission to issue credentials. Storing the issued credential in your wallet also requires the Holder credentials (Change) permission.