Channels
An integration channel describes where and how the Business Wallet pushes domain events. Each channel has a destination, an event filter, optional authentication, and an HMAC signing secret that is used to sign every outbound message.
How to access
- Open the left sidebar.
- Click Settings.
- Under Generic, click Integrations.
- The Channels tab is selected by default.
Channels overview
The Channels tab lists every integration channel configured for the wallet. Each row shows the channel's Name, Type, destination URL, whether it is Enabled, the Created at timestamp, and the Last modified timestamp.
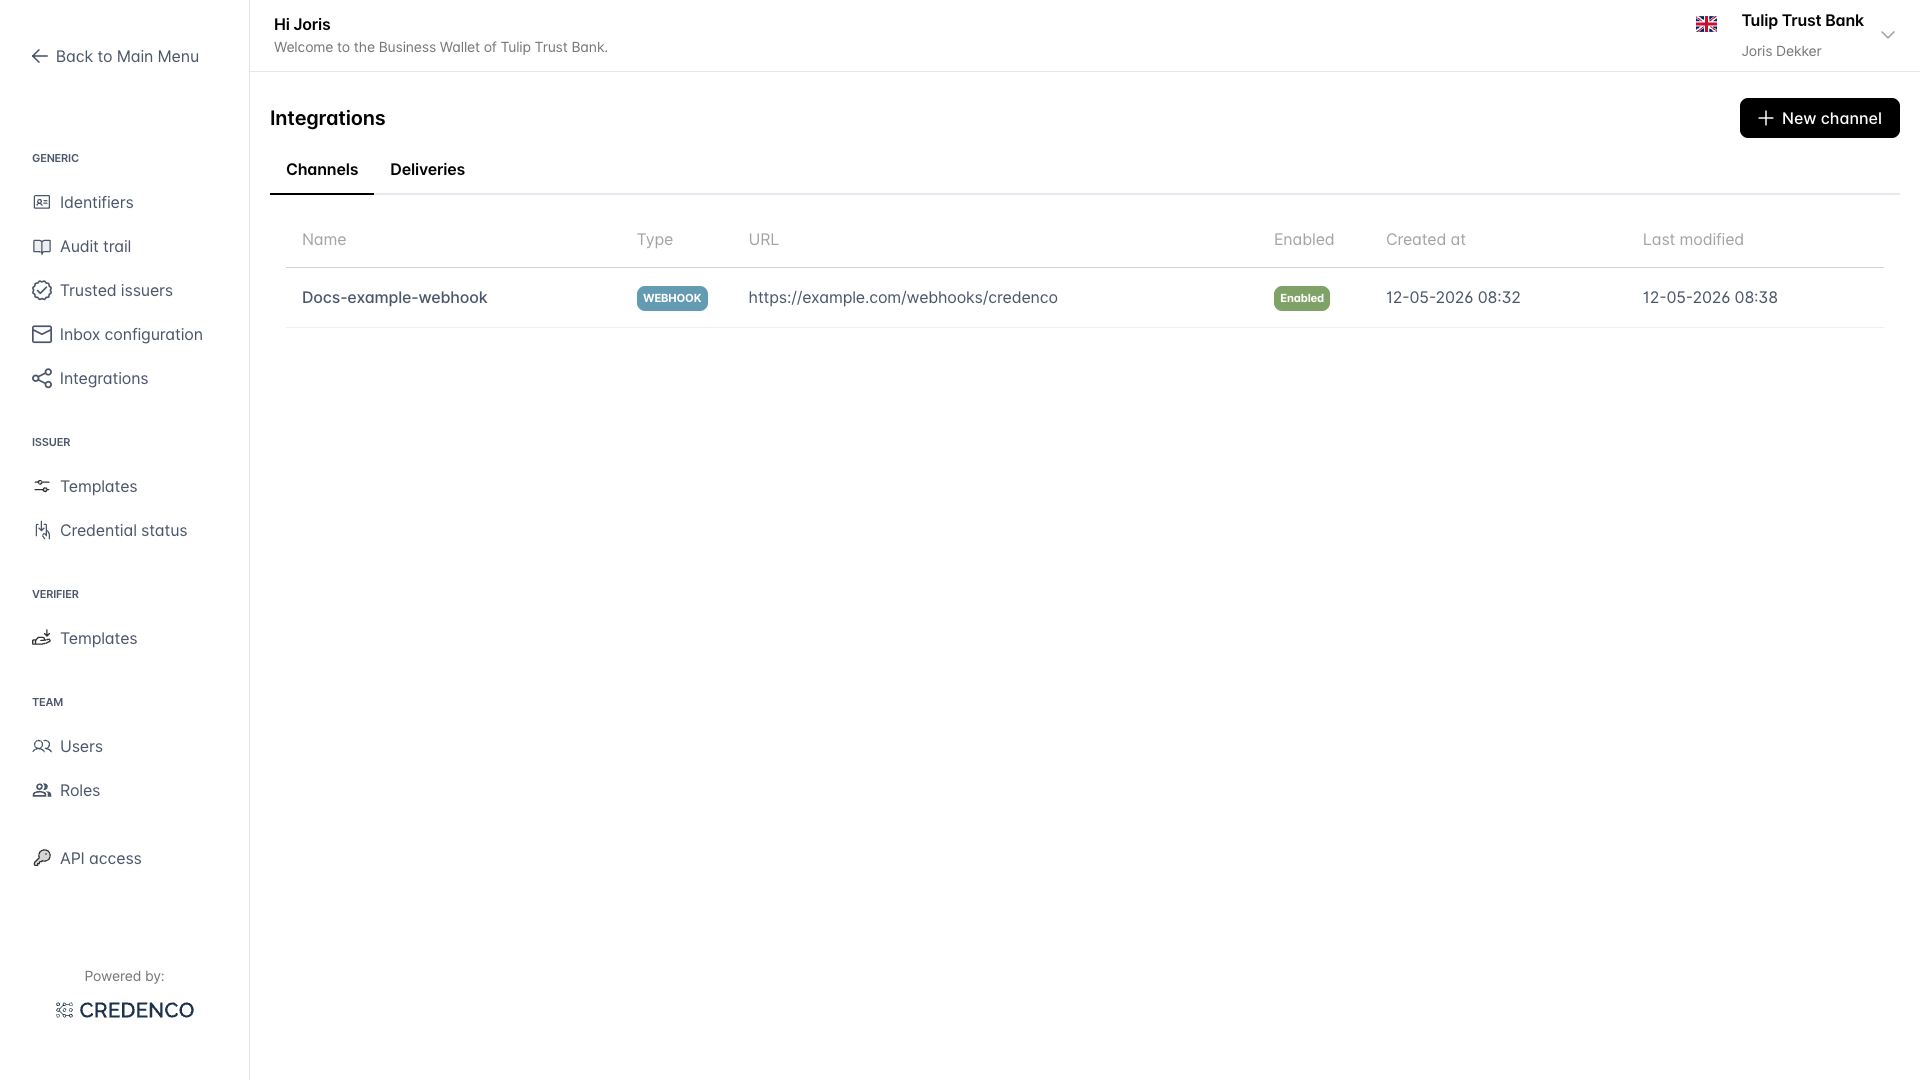
Click on a row to open the channel form and edit its configuration. Use New channel in the top-right to create a new one.
Create a channel
- On the channels overview, click New channel.
- Fill in the form (see Channel form below).
- Click Create.
- The HMAC signing secret dialog appears (see HMAC signing secret below). Copy the secret to your secret manager before closing the dialog — it is only shown once.
- Click I have stored the secret to return to the channels overview.
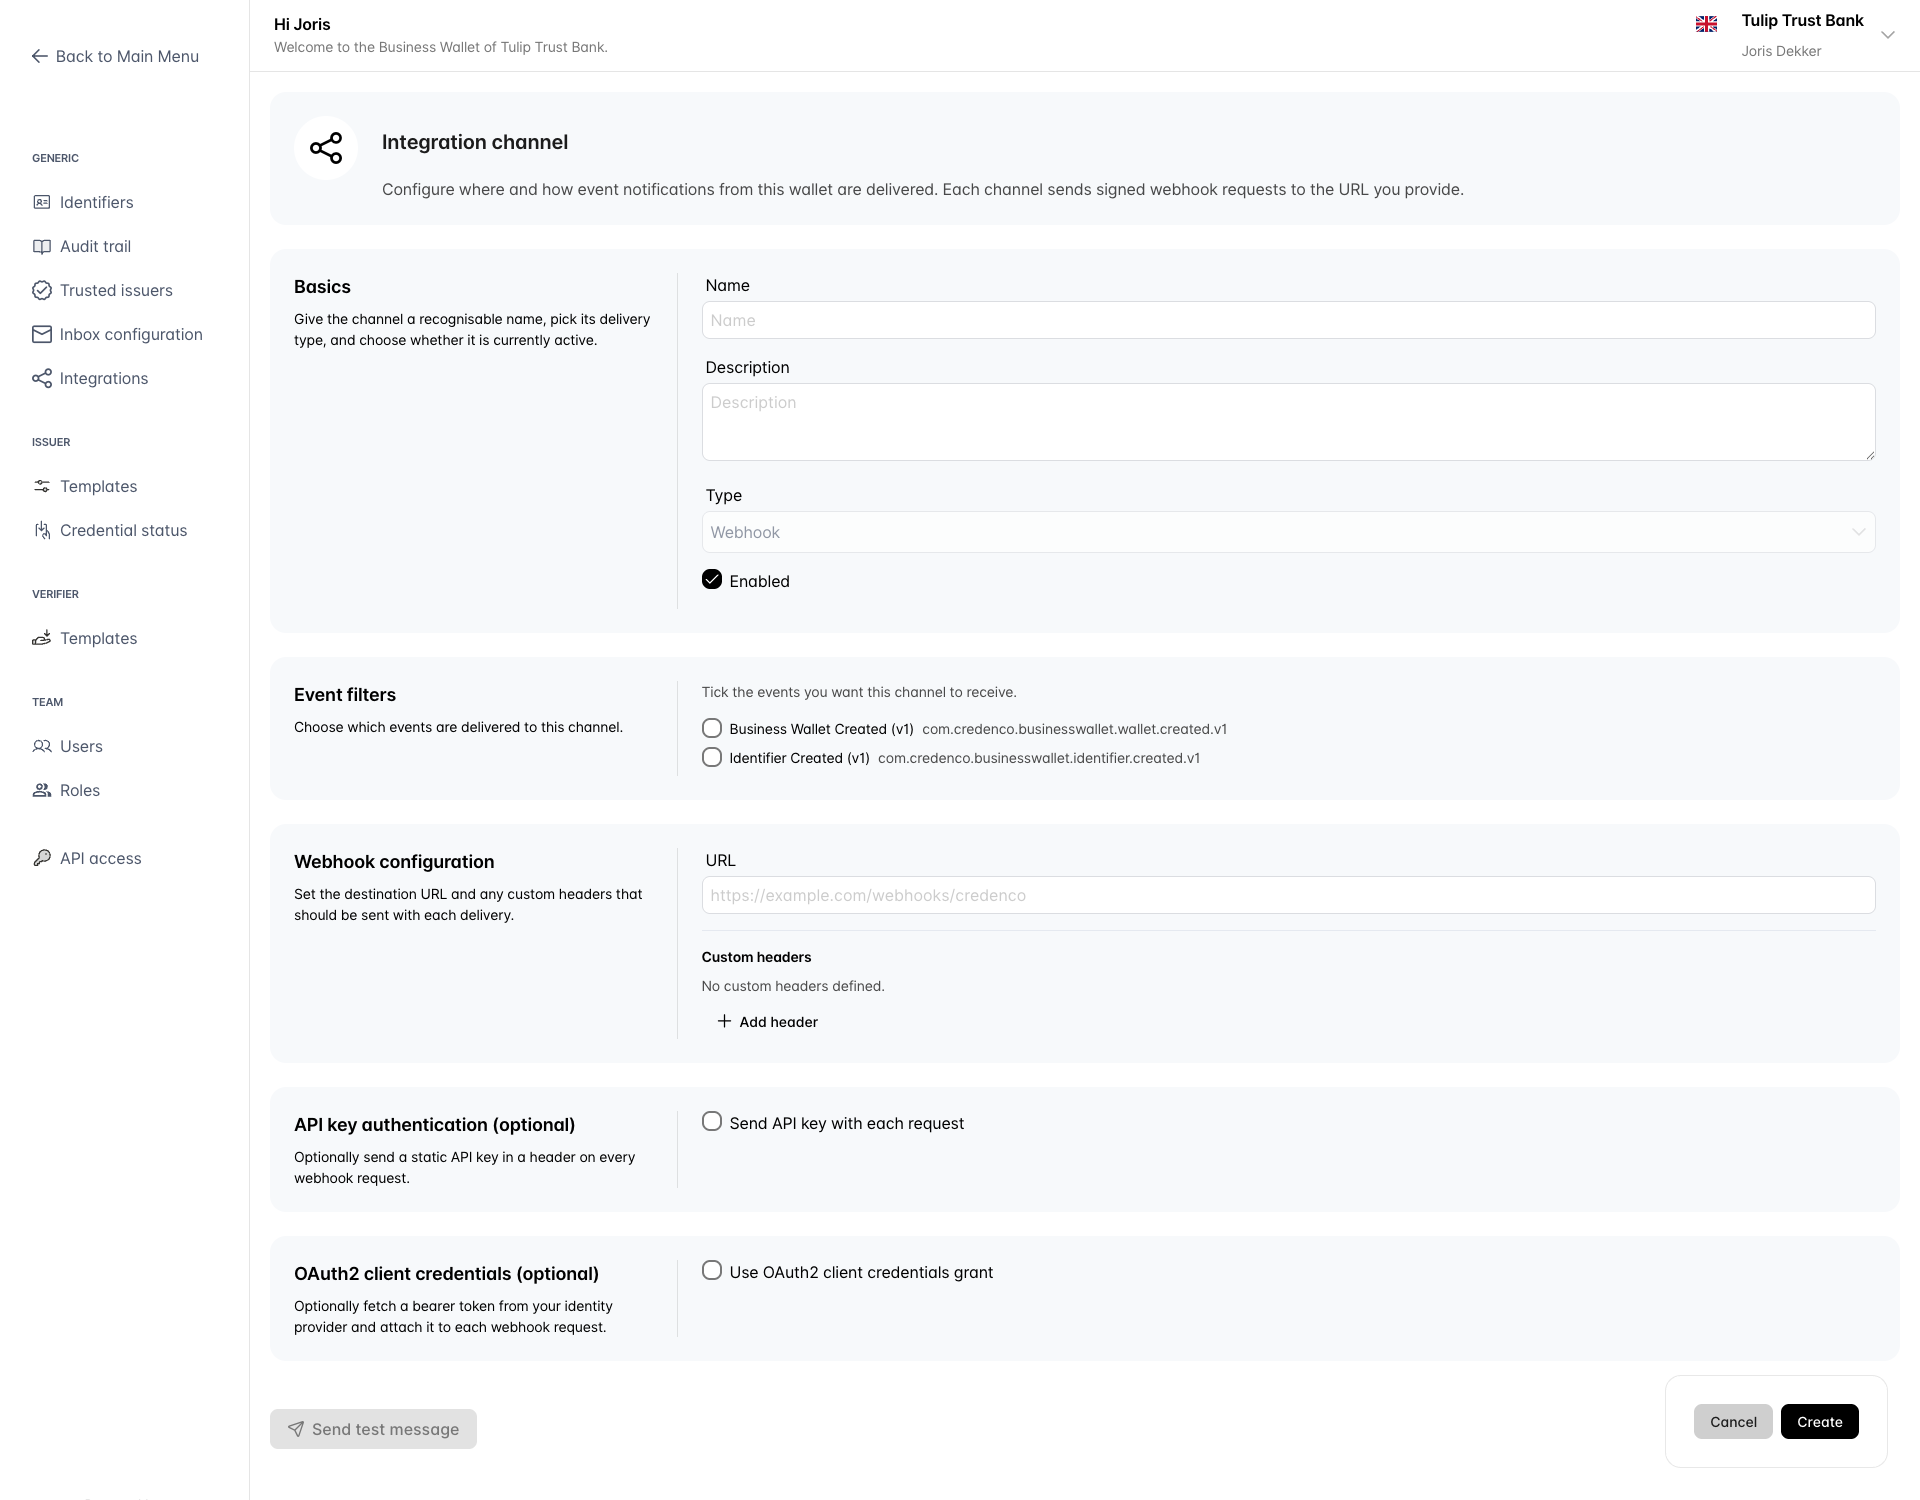
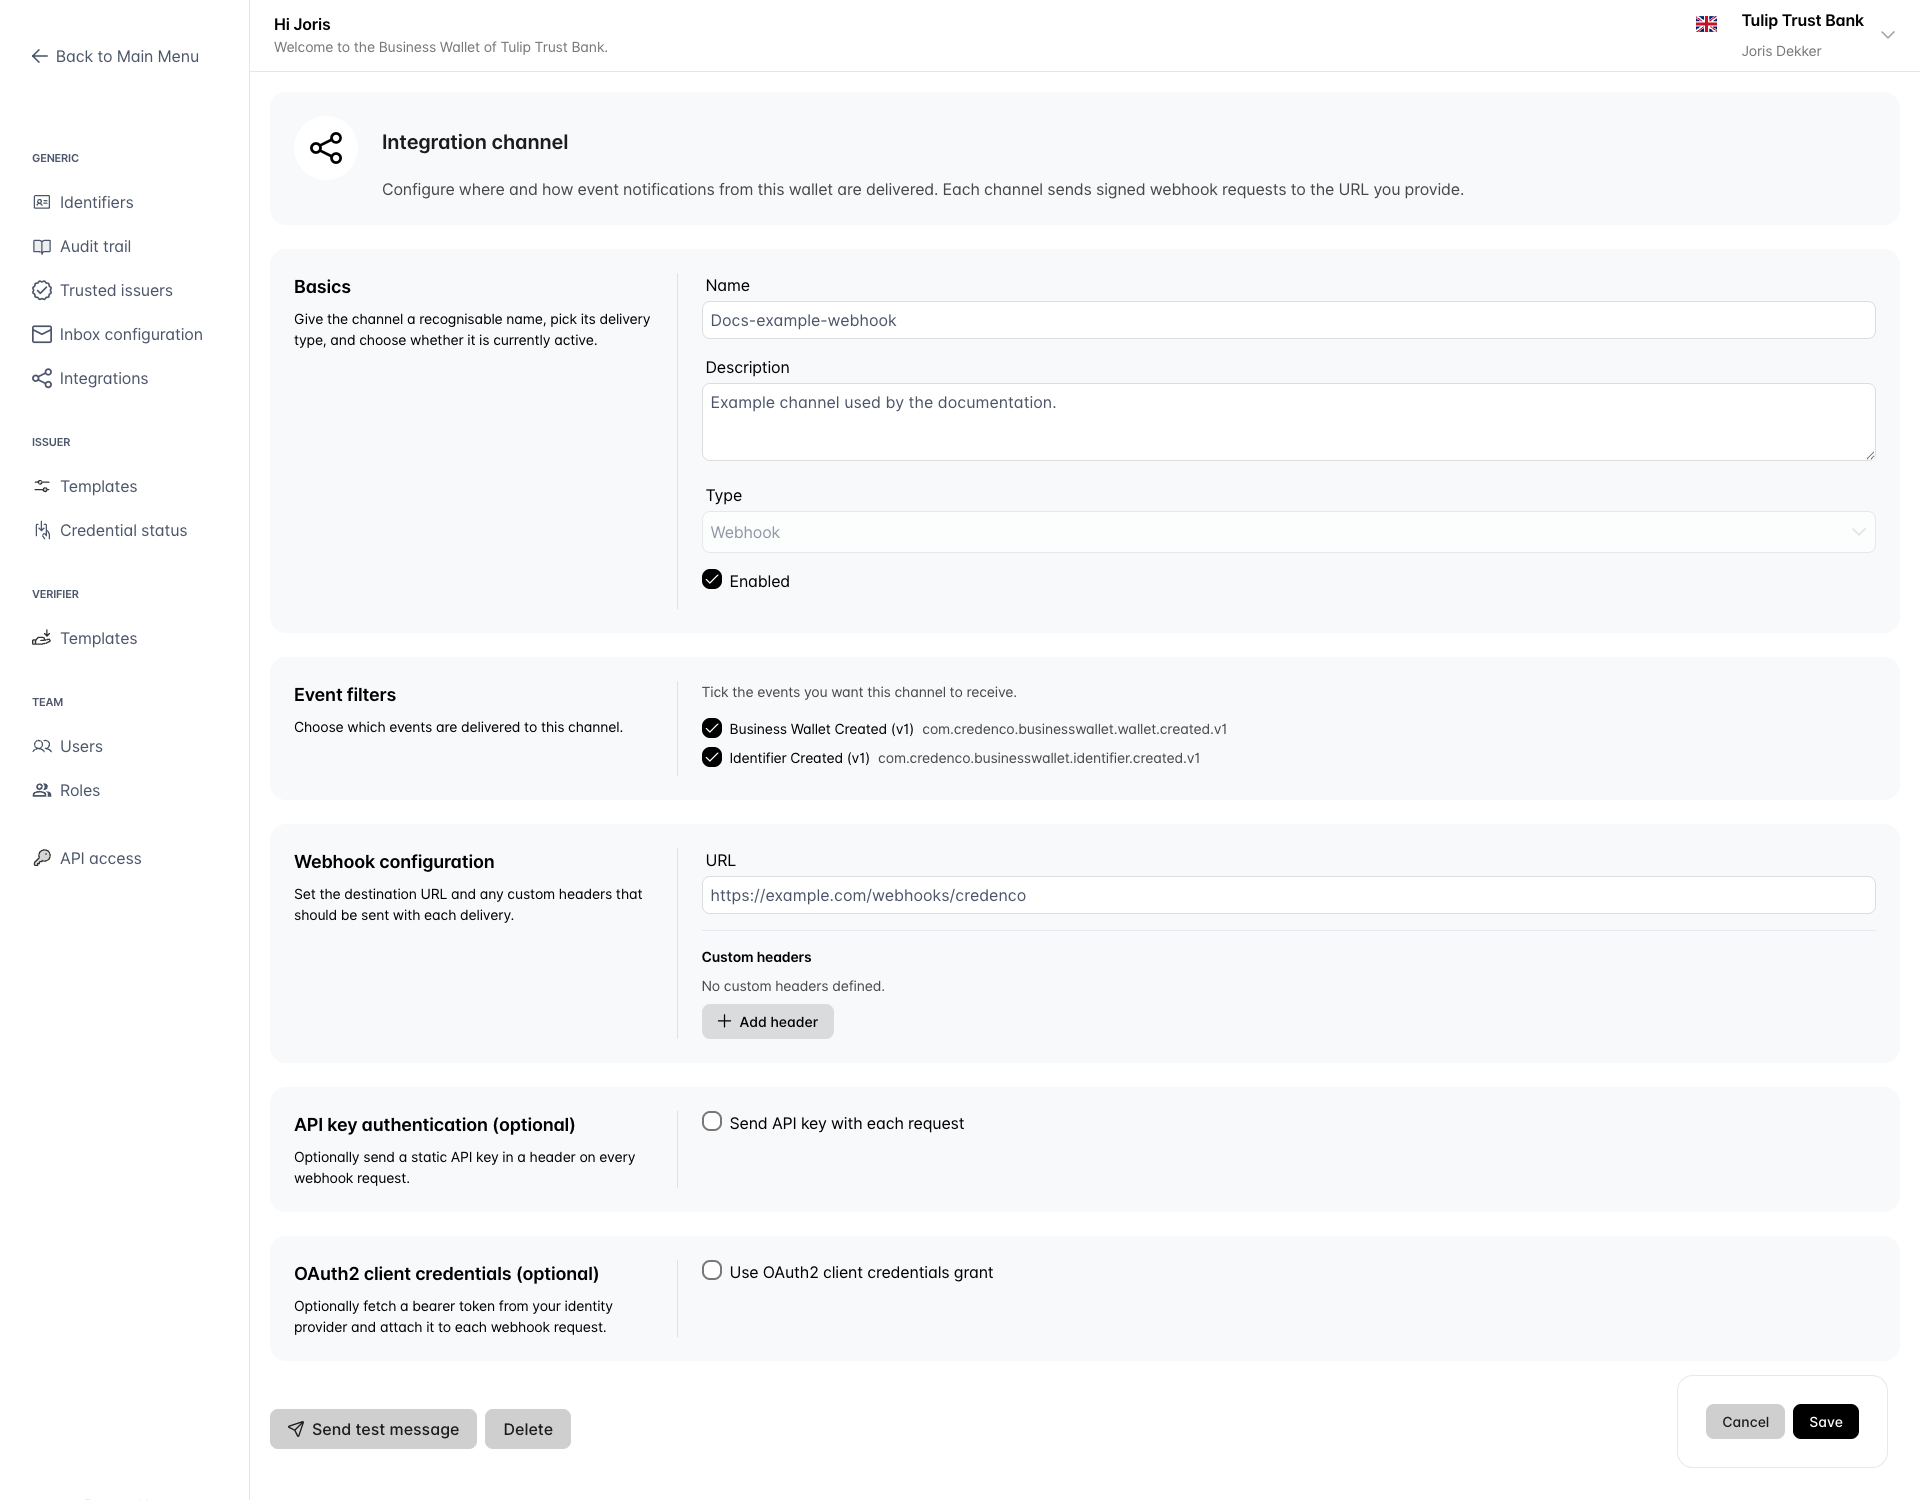
Channel form
The channel form is divided into sections. The same form is used for both creating and editing a channel.
Basics
- Name — A short, recognisable label for this channel. Shown in the channels list and in delivery logs.
- Description — Optional free-text note describing what the channel is for. Maximum 2048 characters.
- Type — The transport used to deliver events. Webhook is the only option available in the SaaS deployment. Kafka, JMS, and custom adapters are available only in on-premise deployments.
- Enabled — When unchecked, the channel is paused and no events are delivered. Existing deliveries are not retried.
Event filters
Tick the events that should be delivered to this channel. If no events are selected, the channel will not receive anything.
See the event catalog for the list of available events and their payload schemas.
Webhook configuration
- URL — The HTTPS endpoint that will receive the CloudEvents messages.
- Custom headers — Optional extra HTTP headers that will be sent with every request. Use Add header to add a row with a name and a value, and the bin icon to remove a row.
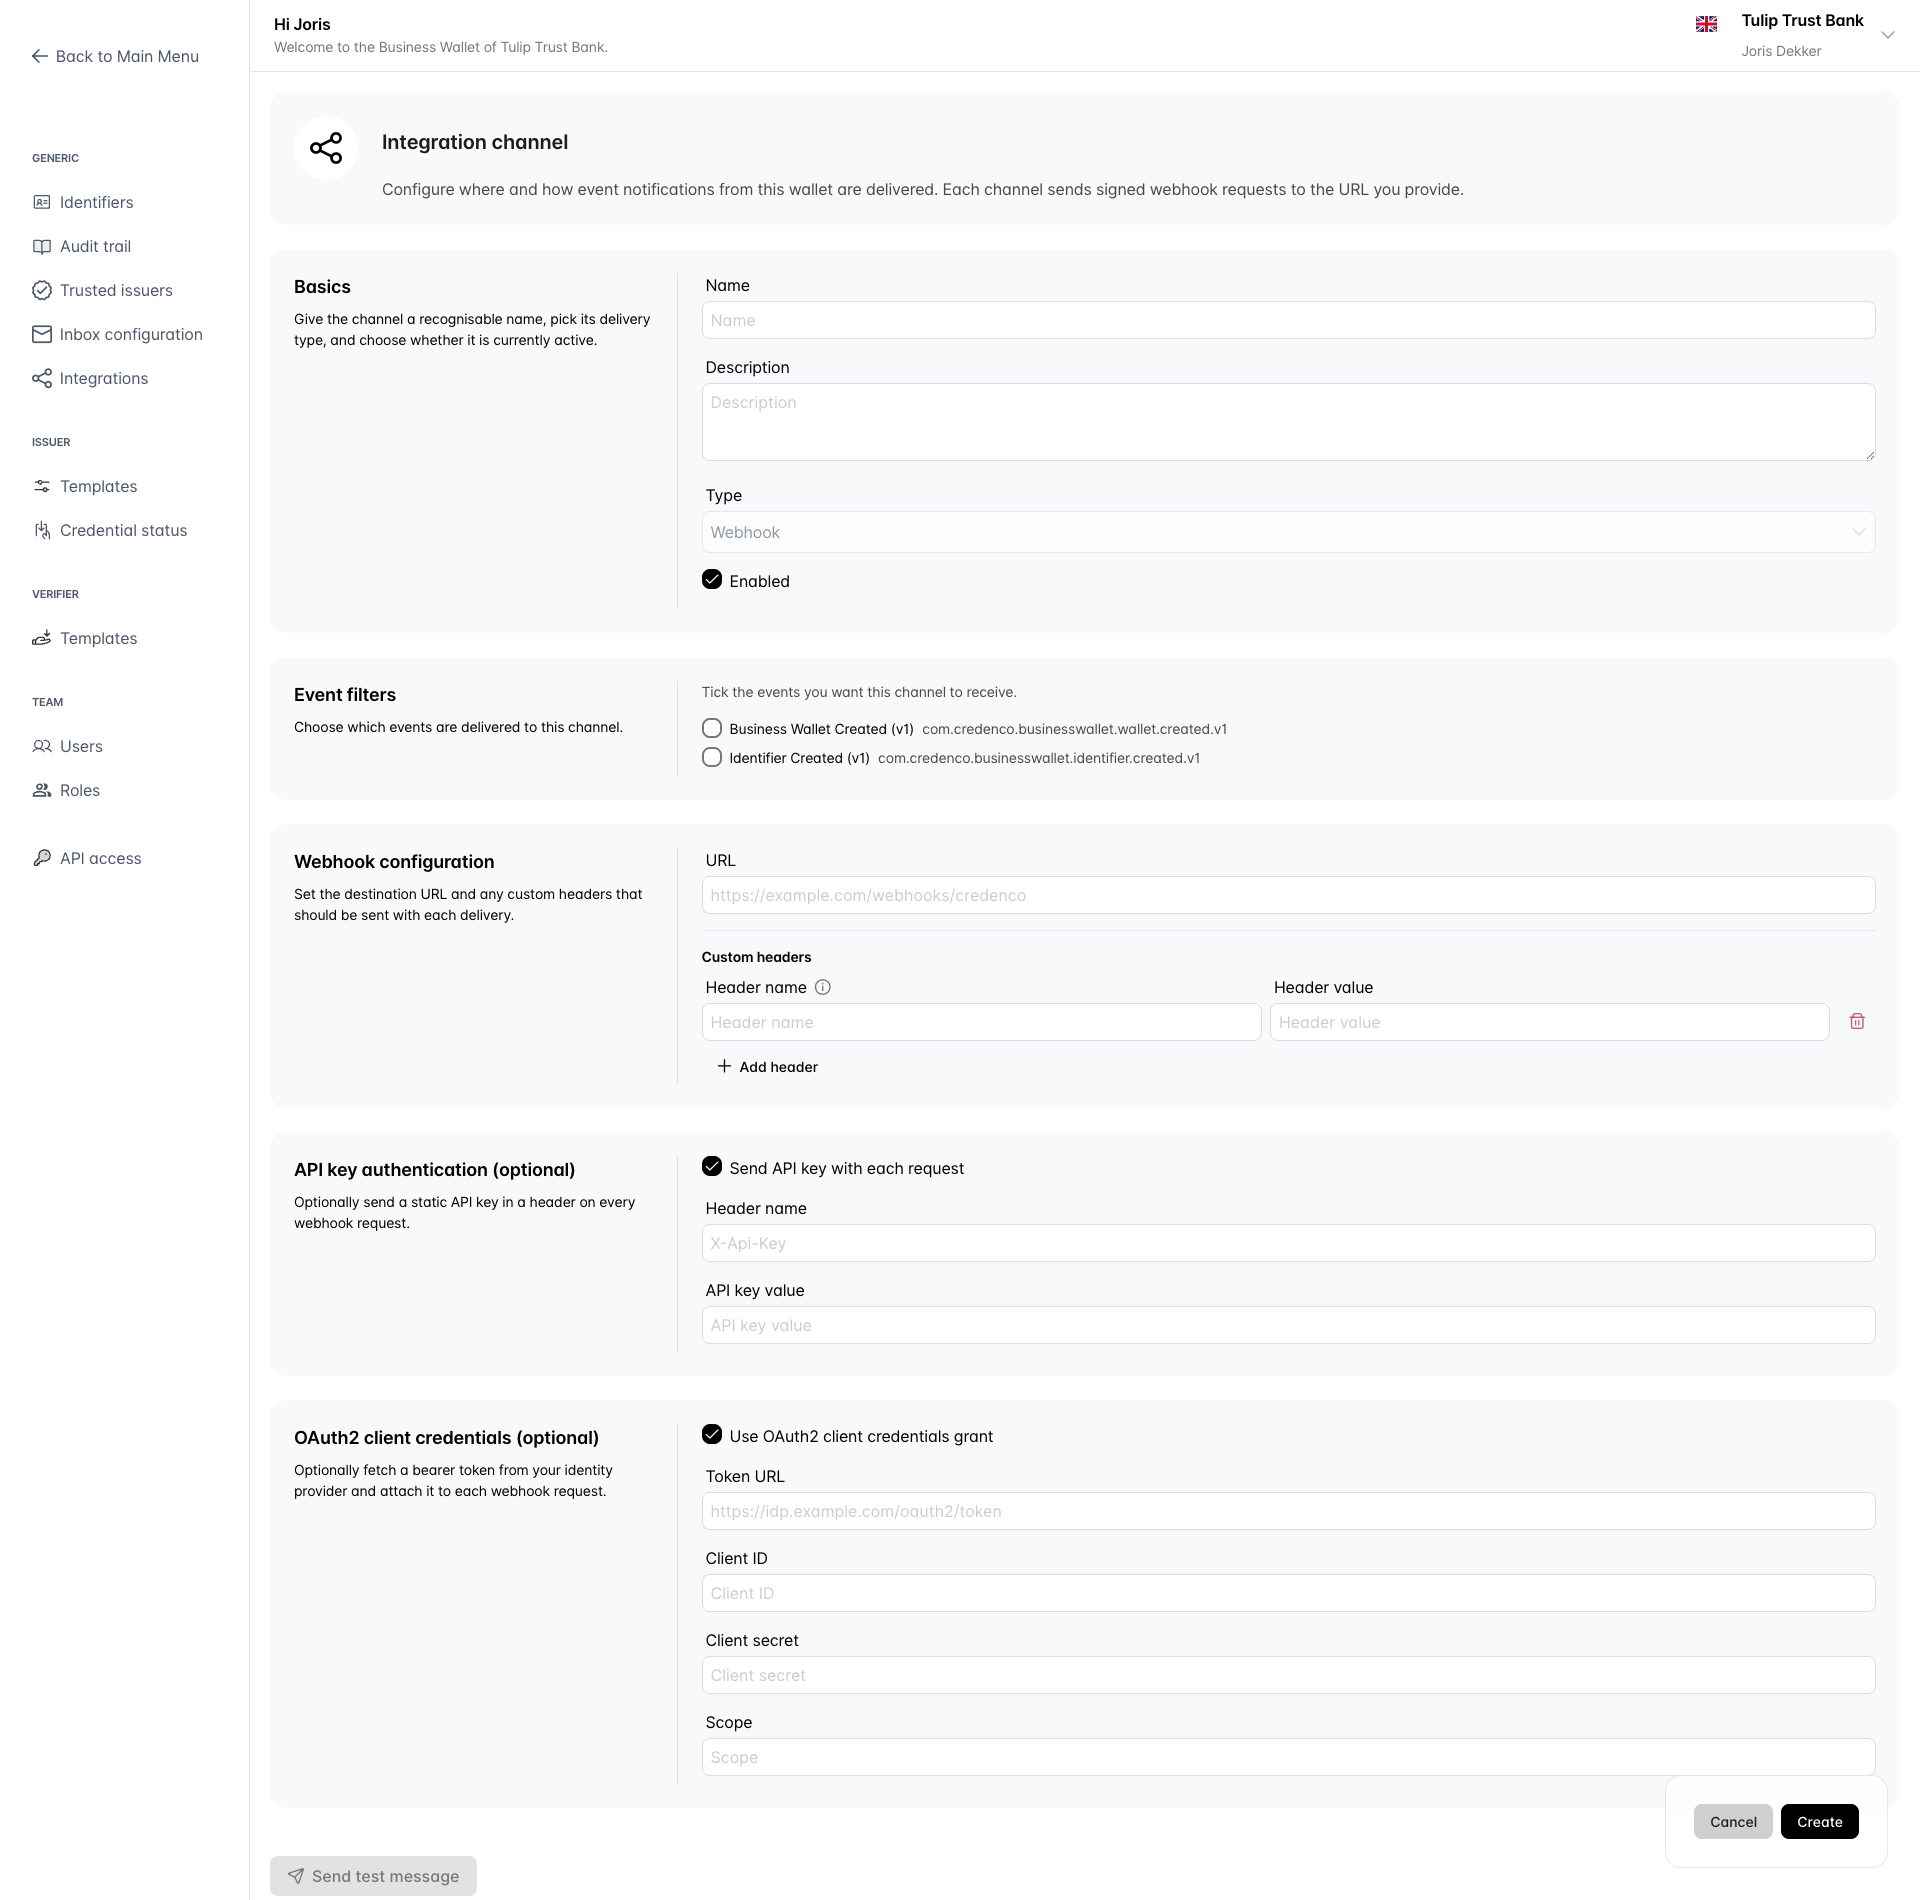
API key authentication (optional)
Tick Send API key with each request to send a static API key in a header on every webhook request.
- Header name — The HTTP header to put the API key in (defaults to
X-Api-Key). - API key value — The secret value.
OAuth2 client credentials (optional)
Tick Use OAuth2 client credentials grant to fetch a bearer token from your identity provider before each delivery and attach it to the webhook request.
- Token URL — The OAuth2 token endpoint of your identity provider.
- Client ID
- Client secret
- Scope — Optional space-separated list of OAuth2 scopes.
See webhook authentication for how the receiver should validate these credentials.
HMAC signing secret
When you create a channel, a unique HMAC SHA-256 signing secret is generated. The Business Wallet uses this secret to sign every outbound message via the X-Credenco-Signature header so your receiver can verify it came from us.
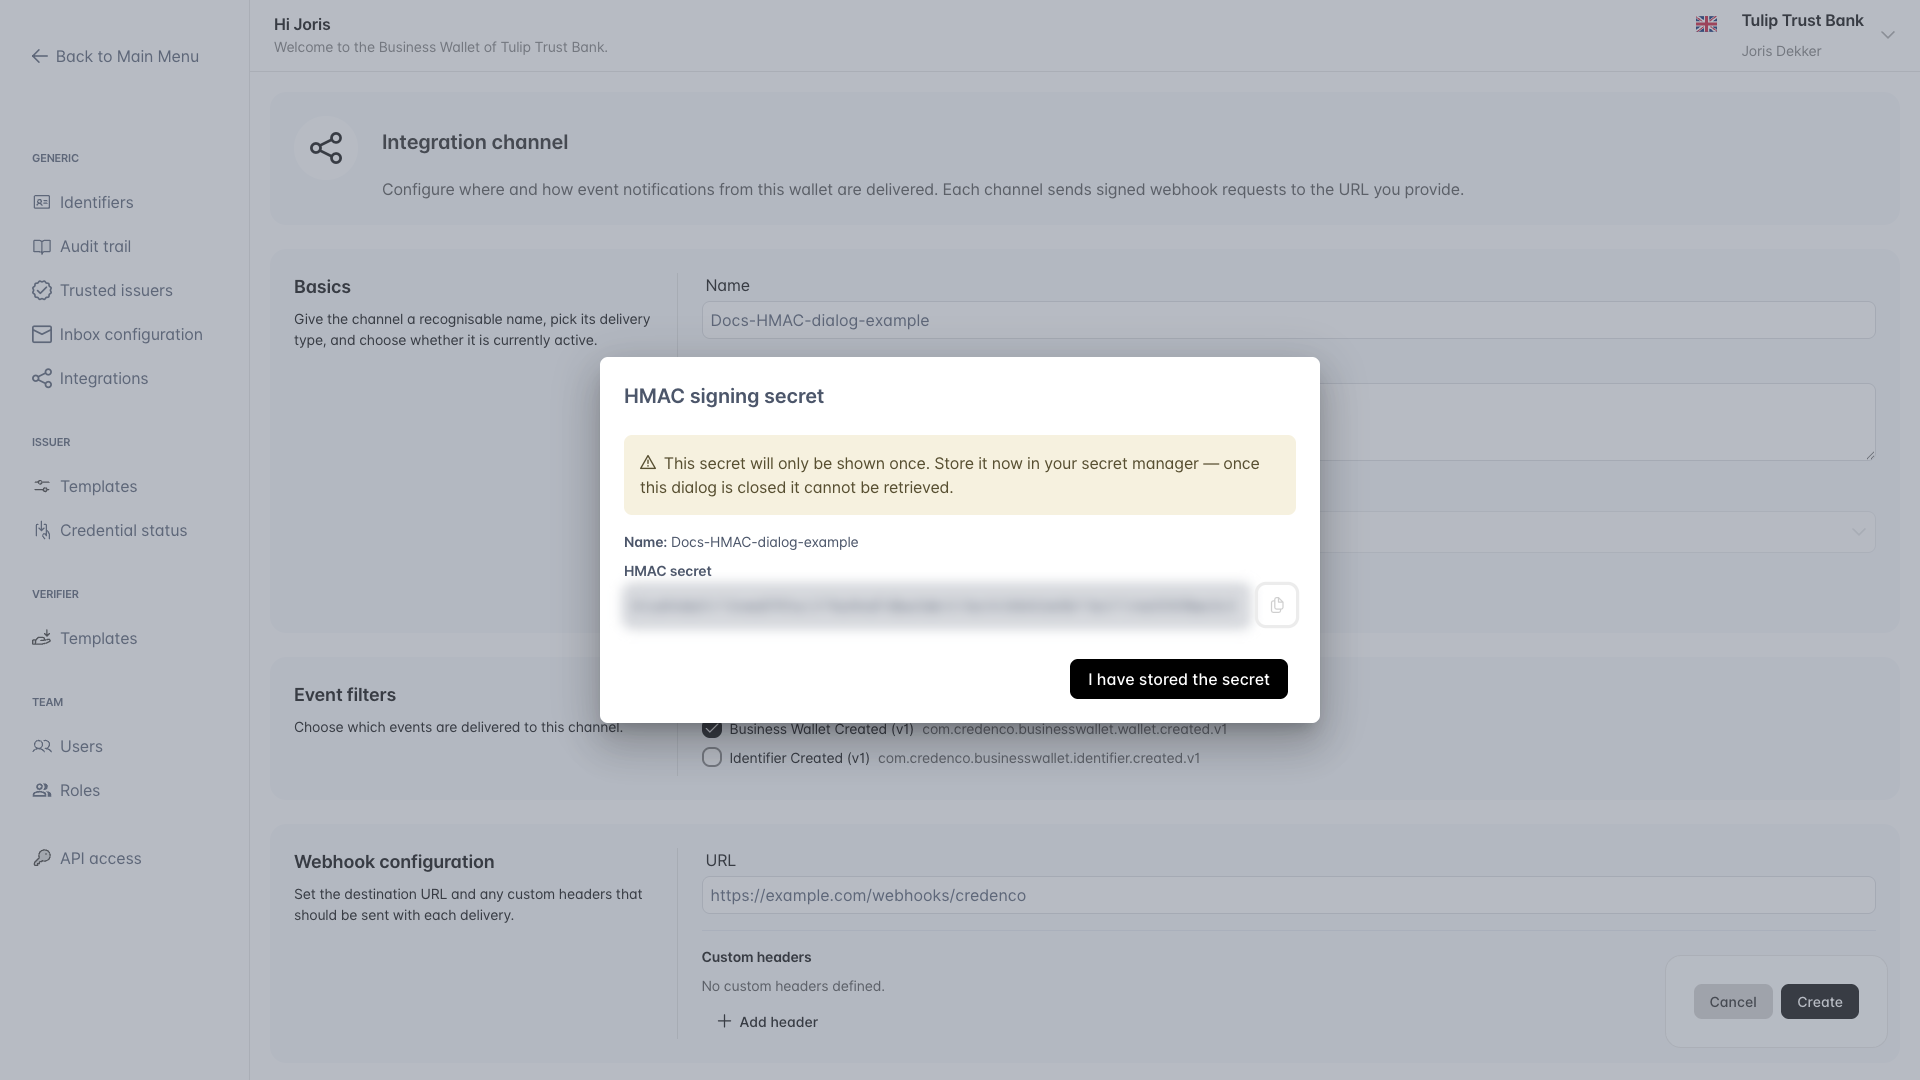
The HMAC secret is shown once at creation time. Copy it to your secret manager before closing the dialog. If you lose it, you will need to delete the channel and create a new one to obtain a new secret.
See webhook authentication for how to verify the signature on the receiver side.
Edit a channel
- On the channels overview, click on the channel you want to edit.
- Update the fields as needed.
- Click Save.
In edit mode, two extra buttons appear below the form:
- Send test message — Send a sample CloudEvents message to the configured URL without affecting any real wallet data. See Send a test message below.
- Delete — Remove the channel permanently. Existing deliveries for this channel are retained in the delivery log but no new deliveries will be created.
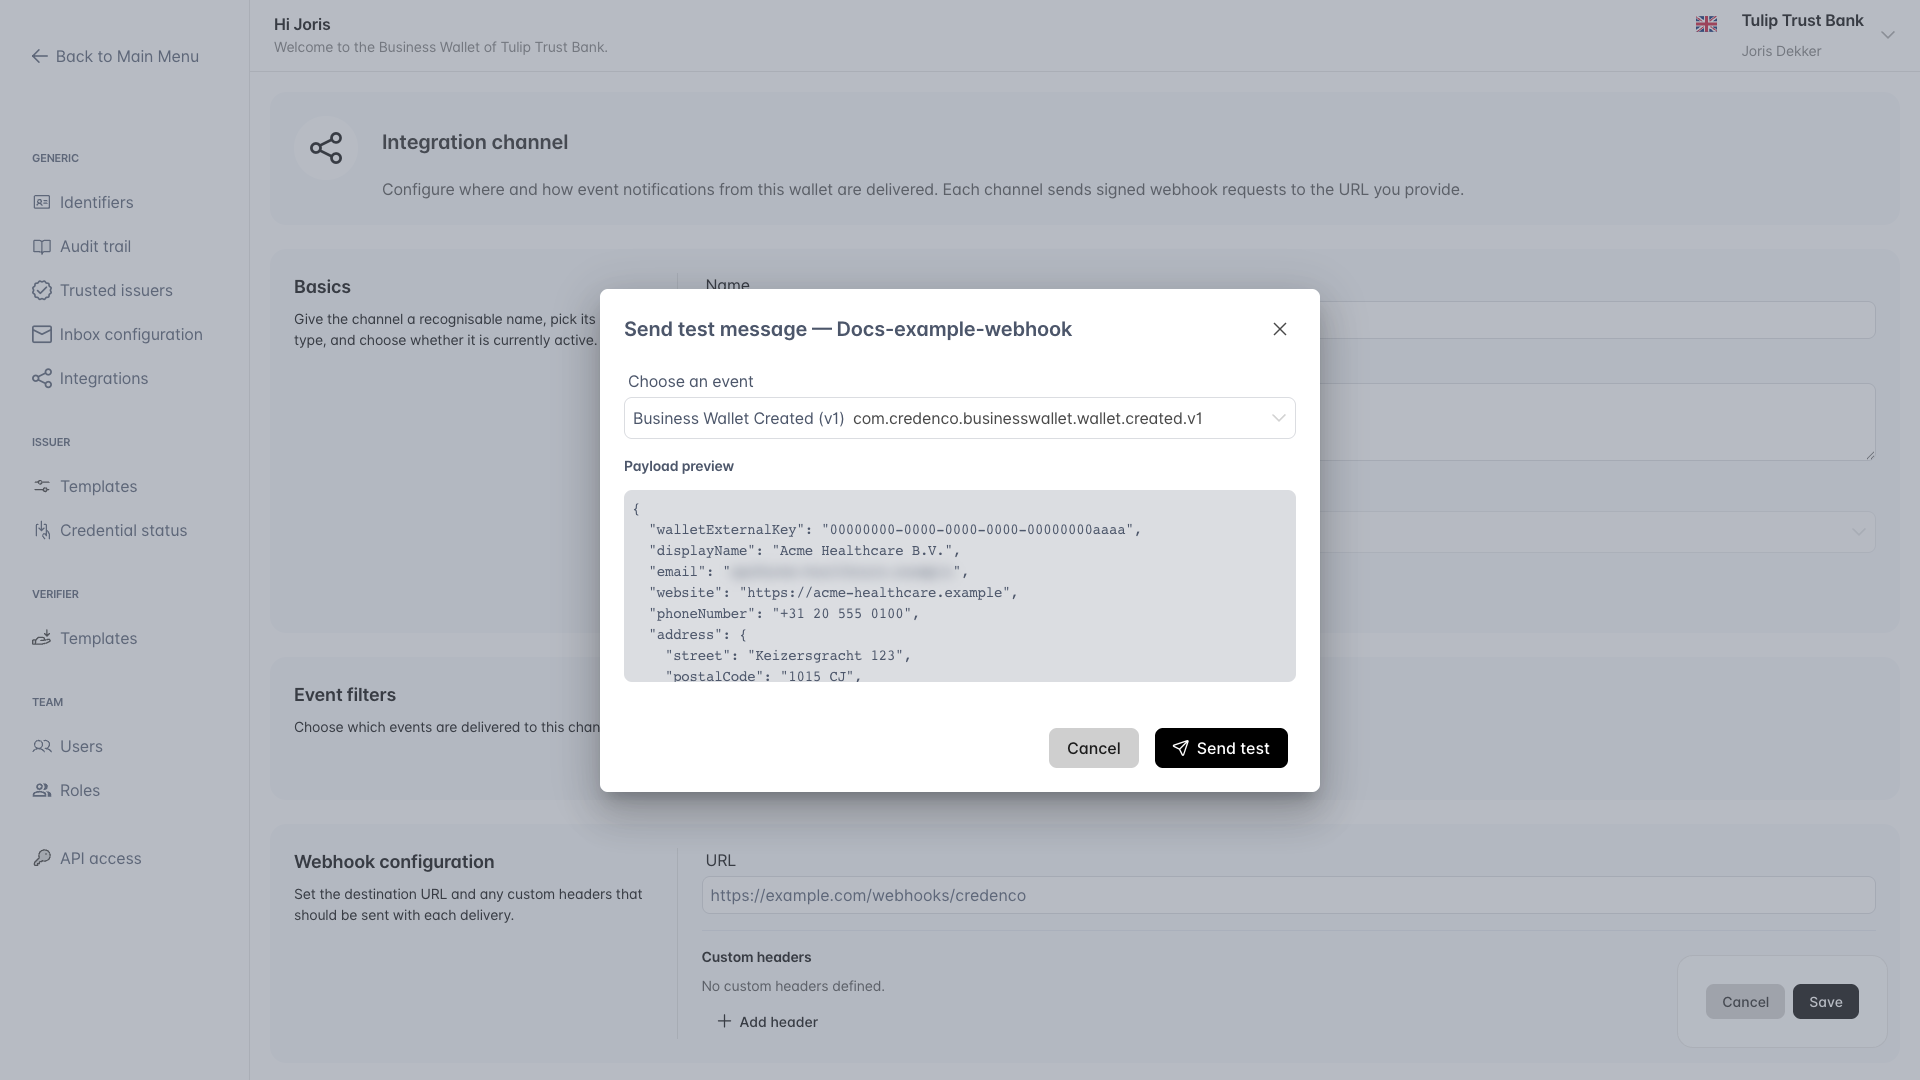
Send a test message
The Send test message action lets you verify your receiver is reachable and correctly configured without waiting for a real wallet event.
- Open a channel in edit mode.
- Click Send test message.
- Choose an event from the Choose an event dropdown. The dialog shows a preview of the JSON payload that will be sent.
- Click Send test.
The dialog then shows the result of the call: Success or Failure, the HTTP status code, the duration, and the request headers that were sent (including the CloudEvents ce-* headers and the X-Credenco-Signature).
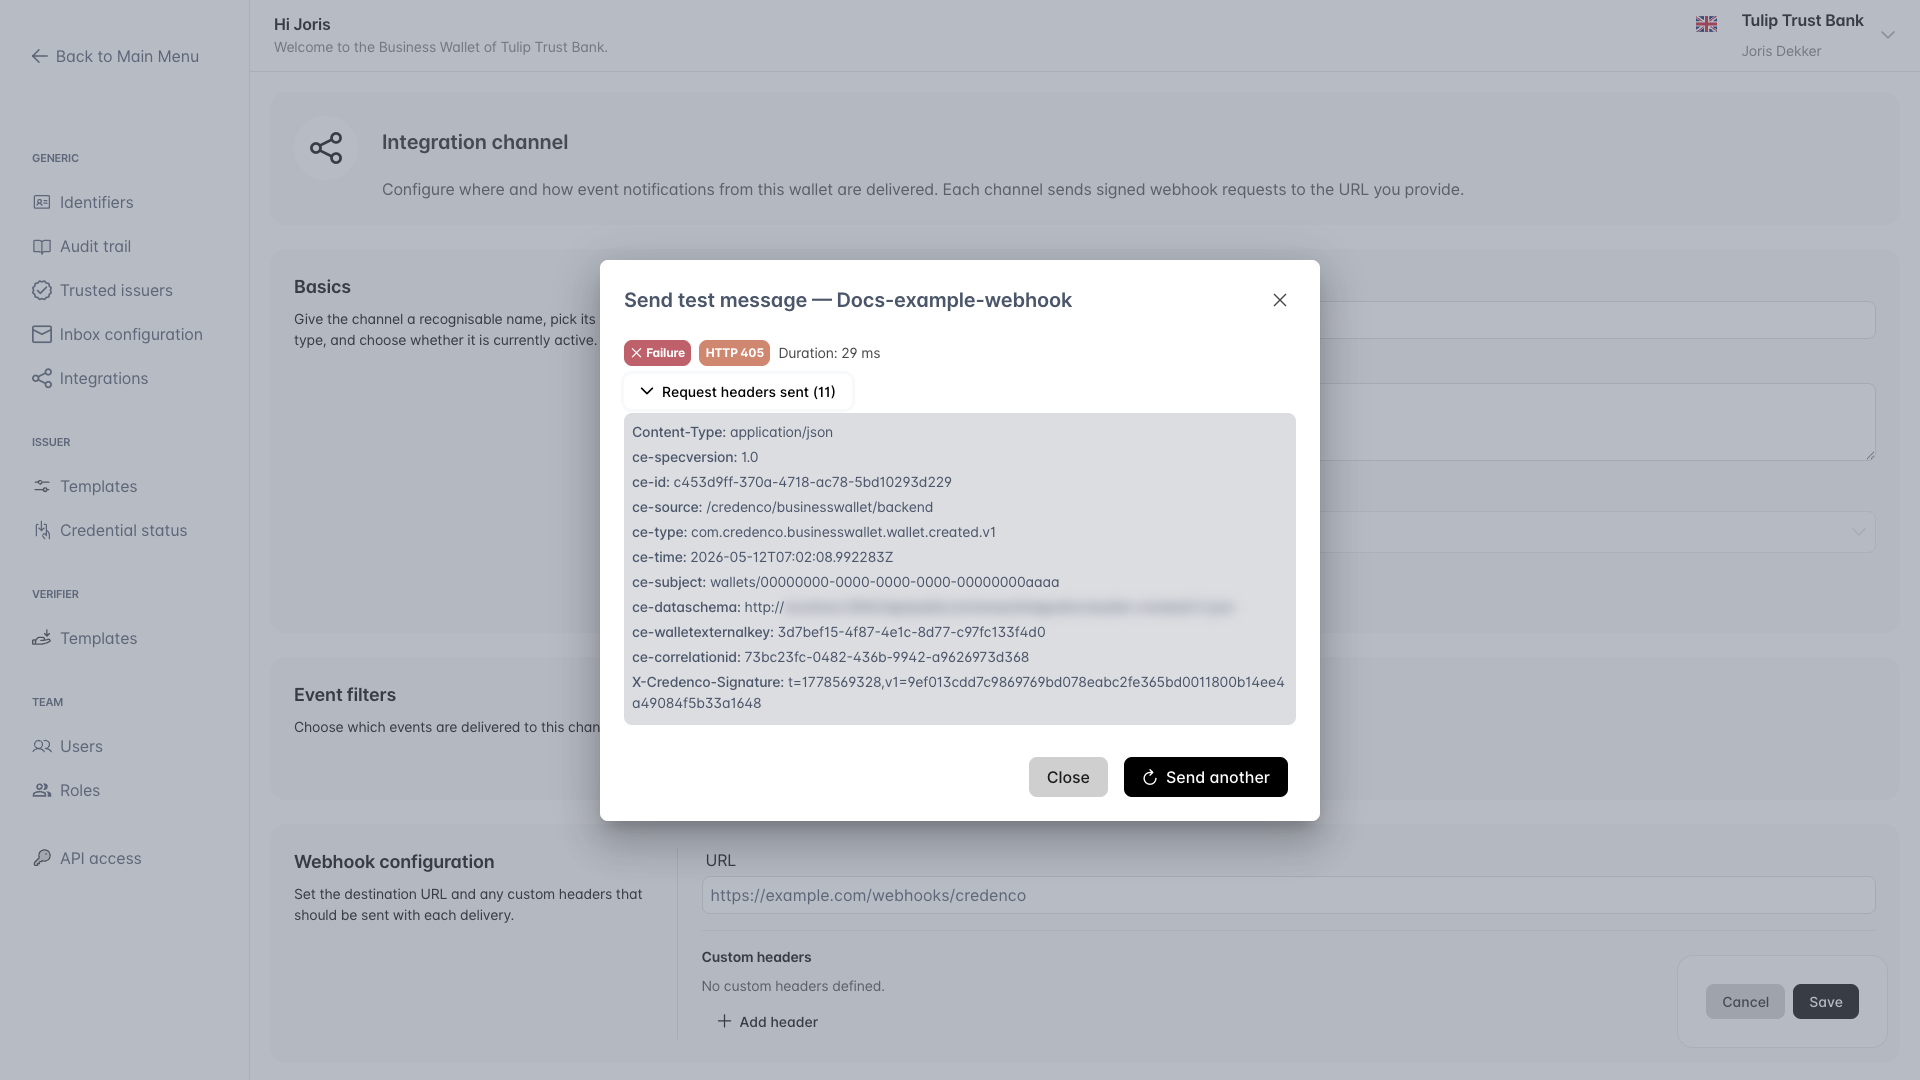
Click Send another to try a different event, or Close to return to the channel form.
Test messages are not recorded as deliveries and do not appear in the Deliveries view. They use the same HMAC signature and authentication settings as real deliveries.
Delete a channel
- On the channels overview, click on the channel you want to delete.
- Click the Delete button.
- Confirm the deletion when prompted.
Managing channels requires the integration channel authorities listed in the Integrations overview — permissions. Specifically, WALLET_INTEGRATION_CHANNEL_CRUD is required to create, edit, or delete channels; WALLET_INTEGRATION_CHANNEL_READ is enough to view the channels list.