Roles
An authorization role defines a group of permissions. A role can be assigned to one or more users, who then inherit all the permissions in that role. Roles are how you control what each user can see and do in the wallet.
How to access
- Open the left sidebar.
- Click Settings.
- Under Team, click Roles.
Roles overview
The Authorization roles screen lists every role configured for this wallet. Each row shows the role's Name and Description.
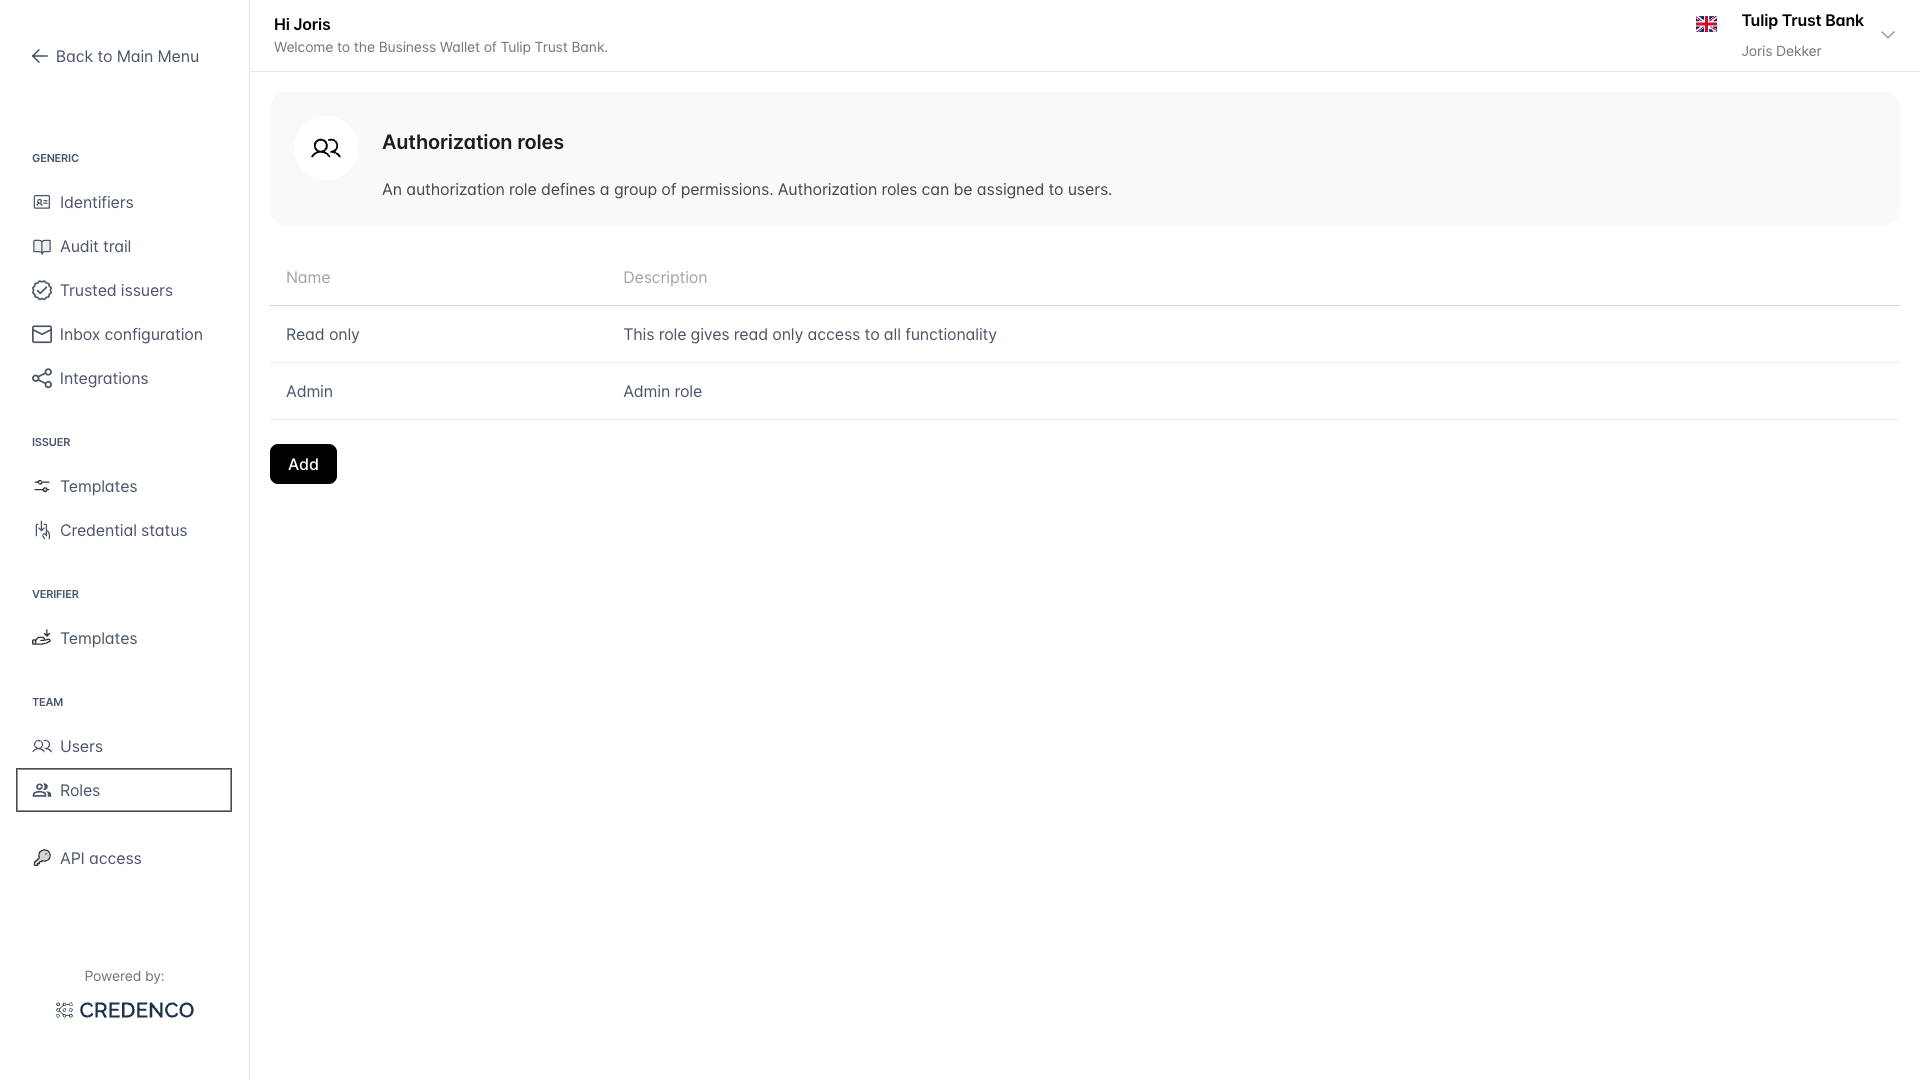
Click a row to open the role and edit its details.
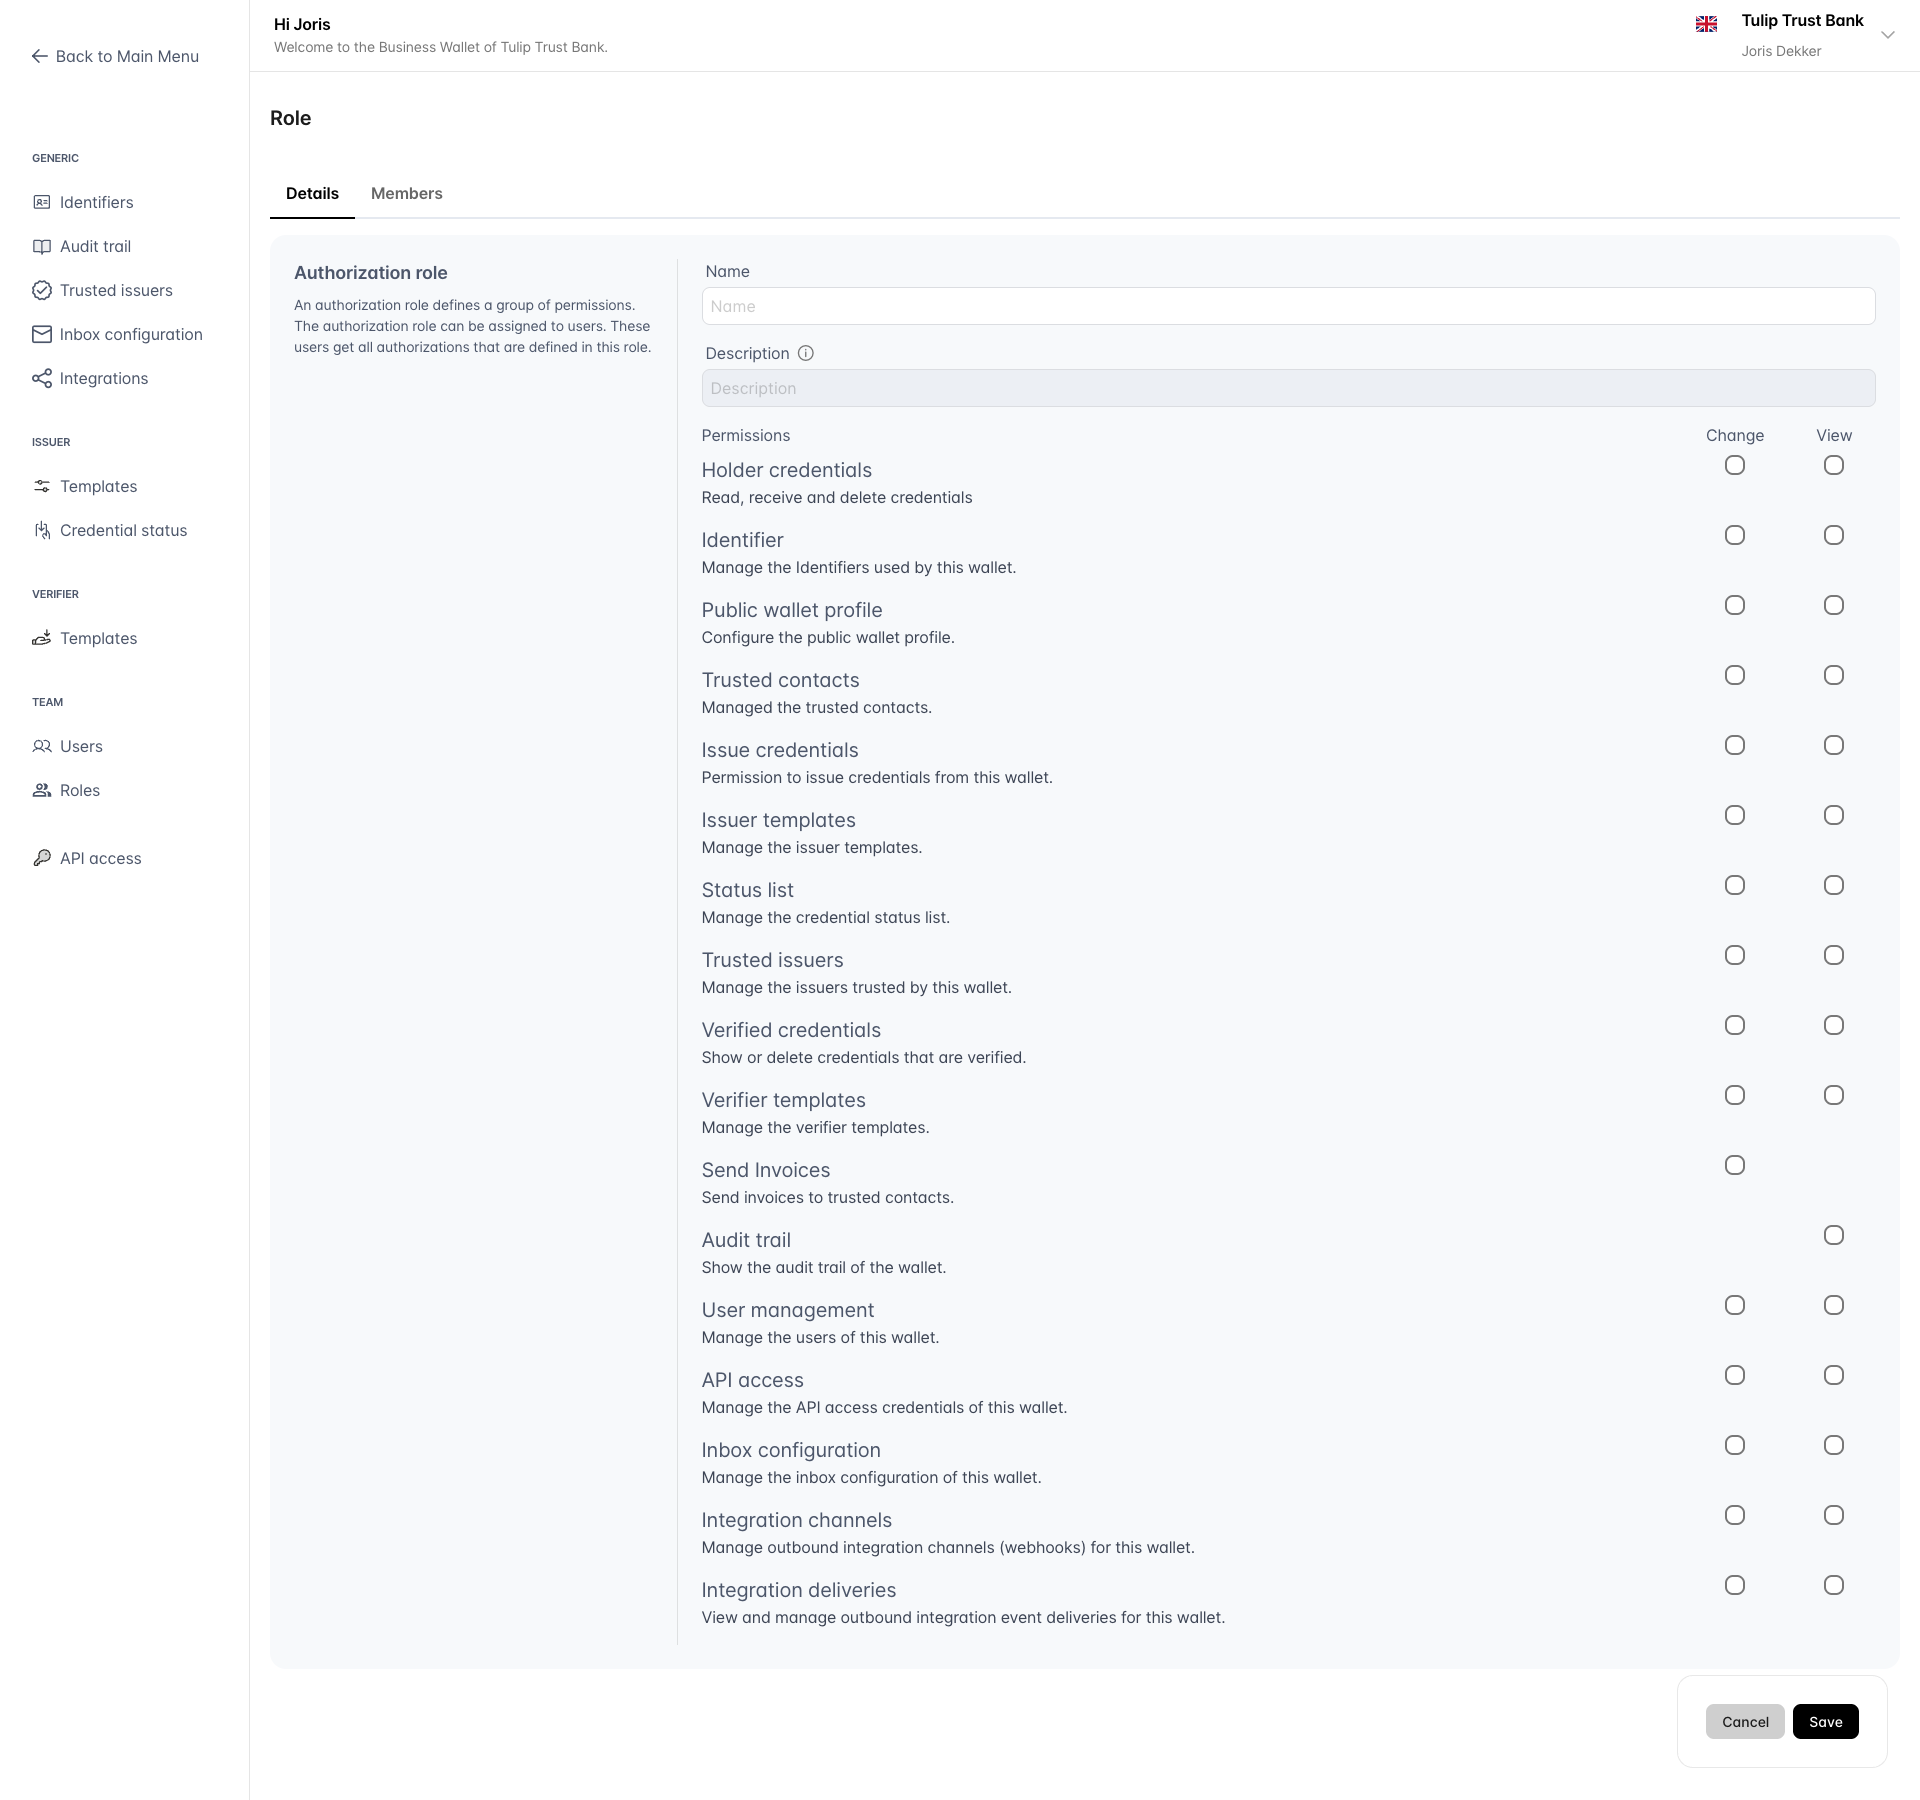
Create a role
- On the roles overview, click Add in the top right.
- Enter a Name for the role.
- Enter a Description explaining the purpose of the role.
- Tick the permissions to grant (see Configure permissions below).
- Click Save.
After saving, the Members tab becomes available so you can assign users to the role.
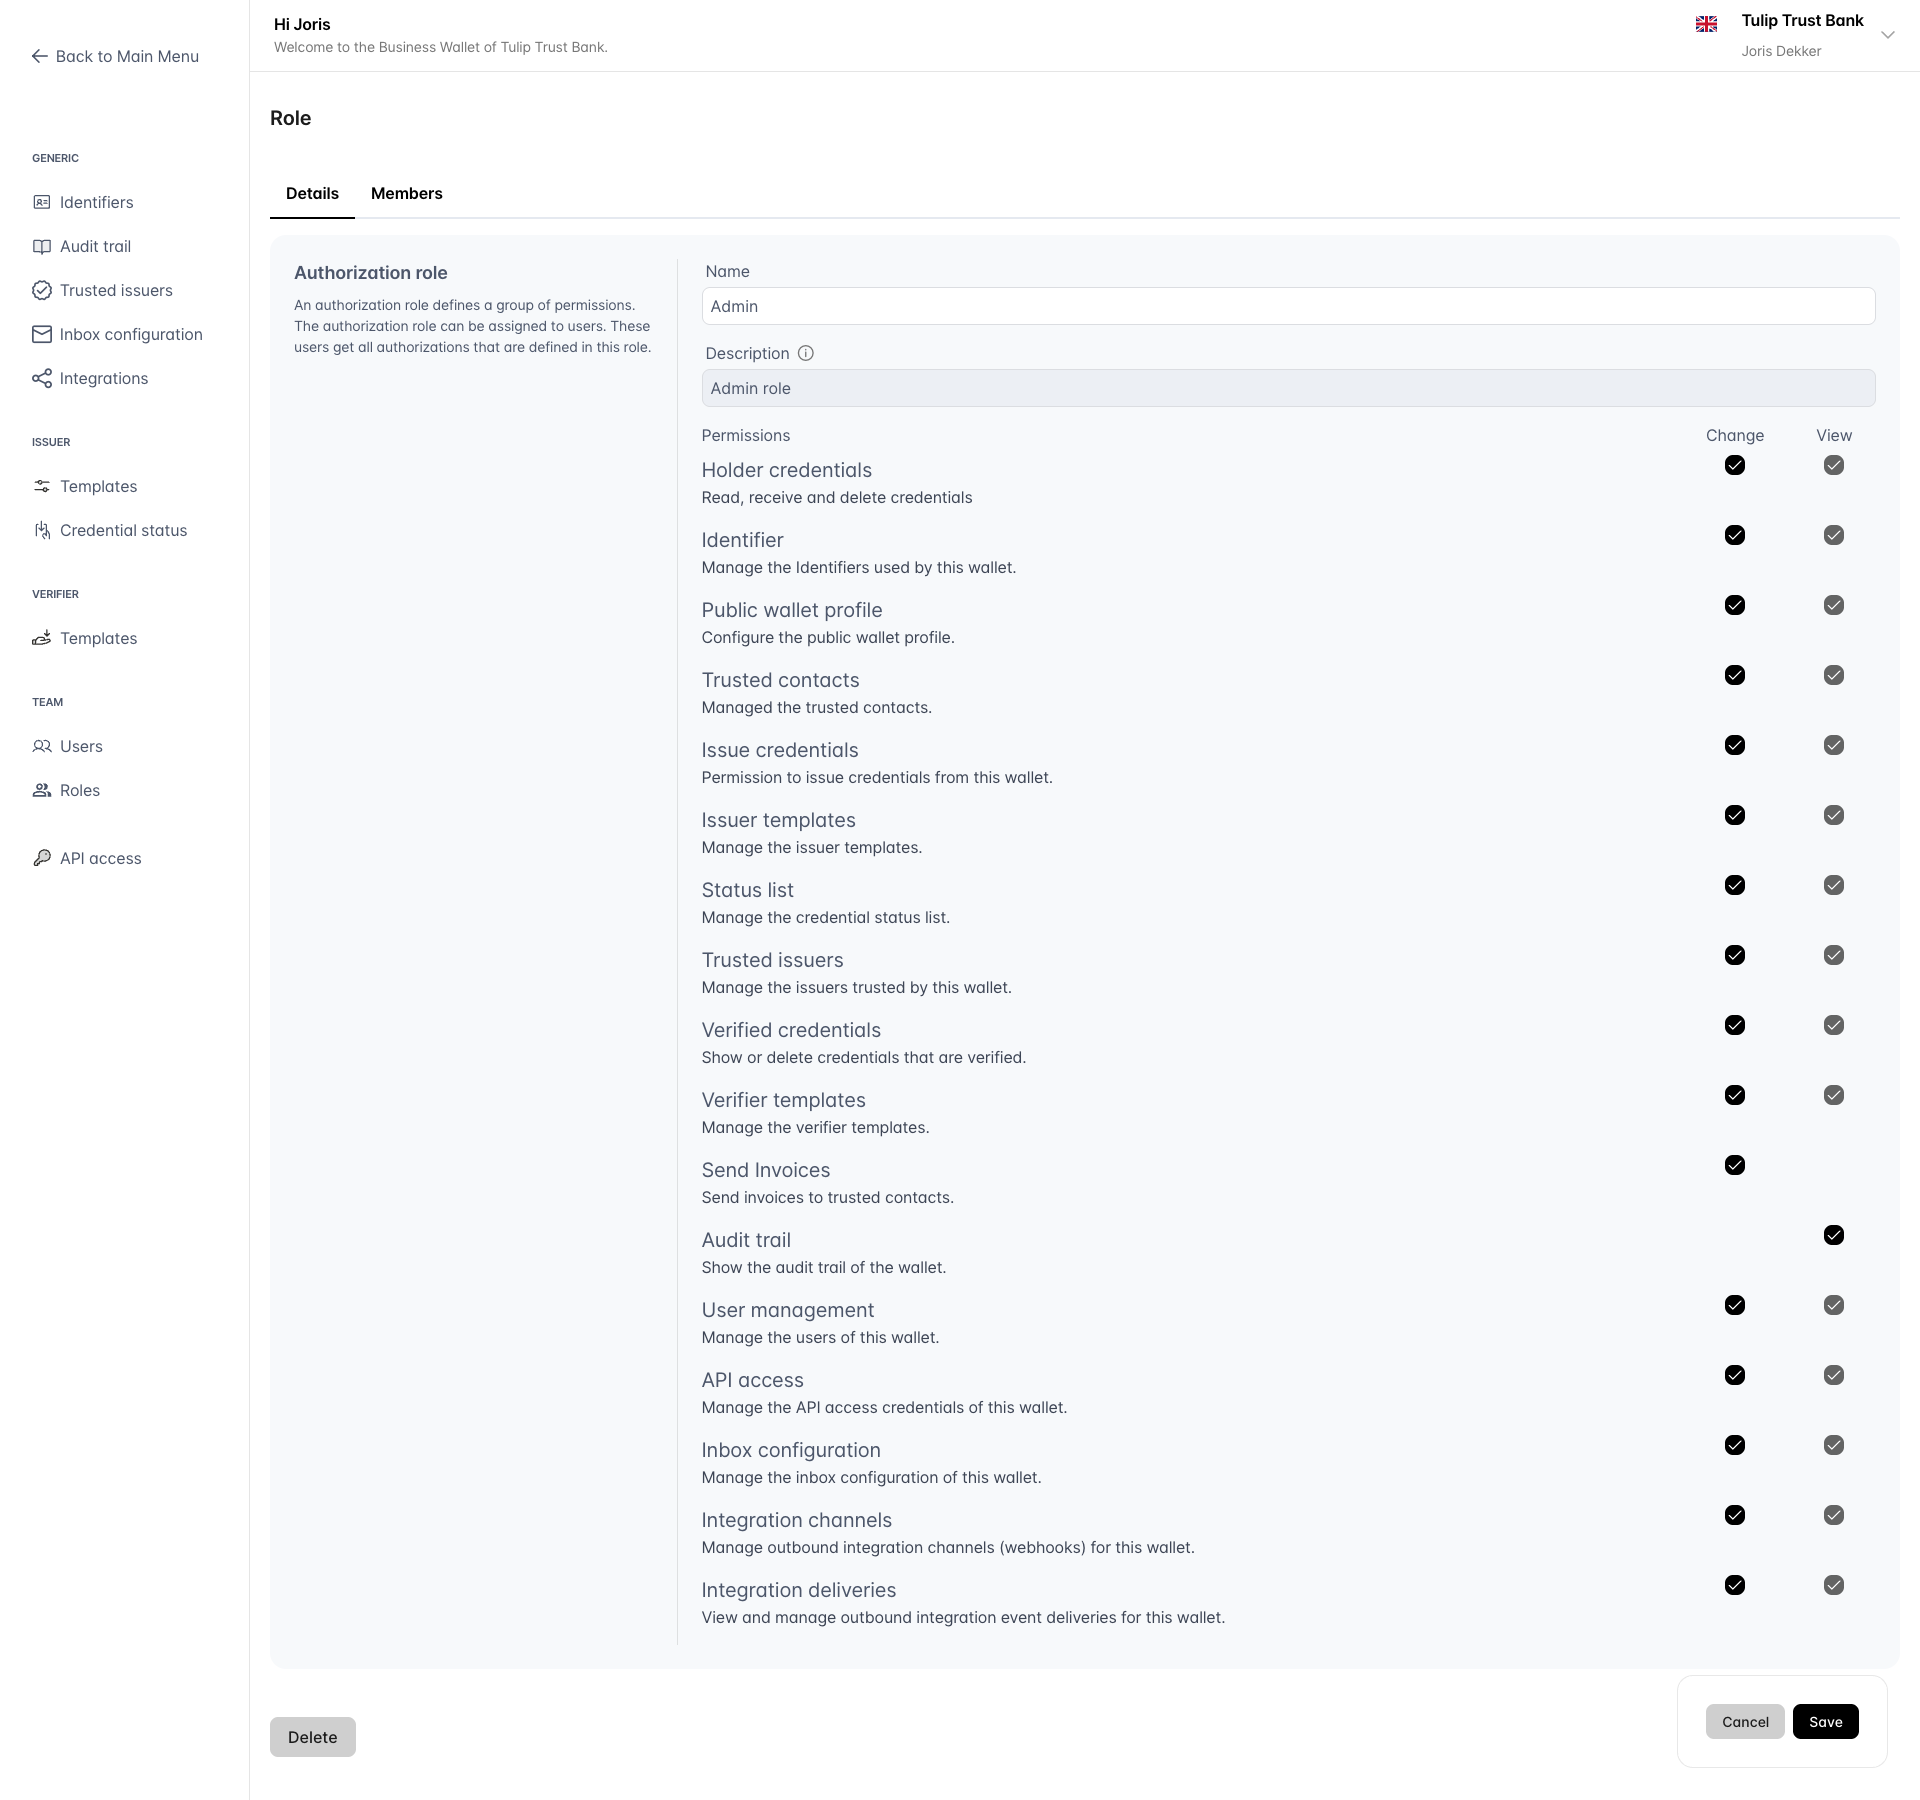
Edit a role
- On the roles overview, click the role you want to edit.
- The Details tab opens, showing the role's name, description, and permissions.
- Update the fields as needed.
- Click Save.
Configure permissions
Each role has a permissions matrix where you control what users with this role can do. Permissions are organized in rows, with up to two columns:
- Change — Allows the user to create, edit, and delete items.
- View — Allows the user to view items without making changes.
Ticking Change automatically ticks View as well.
Available permissions
| Permission | Description |
|---|---|
| Holder credentials | Read, receive and delete credentials |
| Identifier | Manage the identifiers used by this wallet |
| Public wallet profile | Configure the public wallet profile |
| Trusted contacts | Manage the trusted contacts |
| Issue credentials | Issue credentials from this wallet |
| Issuer templates | Manage the issuer templates |
| Status list | Manage the credential status list |
| Trusted issuers | Manage the issuers trusted by this wallet |
| Verified credentials | Show or delete credentials that are verified |
| Verifier templates | Manage the verifier templates |
| Send Invoices | Send invoices to trusted contacts |
| Audit trail | Show the audit trail of the wallet |
| User management | Manage the users of this wallet |
| API access | Manage the API access credentials of this wallet |
| Inbox configuration | Manage the inbox configuration of this wallet |
| Integration channels | Manage outbound integration channels (webhooks) for this wallet |
| Integration deliveries | View and manage outbound integration event deliveries for this wallet |
A few permissions only expose a single Change column — for example Send Invoices and Audit trail — because the nature of that feature does not require both levels of access.
The role required to call a specific API endpoint is documented on the API endpoint page itself, under the Required Role section in the endpoint description. For example, see the Start issue Credential API.
Manage members
The Members tab shows every user currently assigned to this role. The tab badge shows the member count.
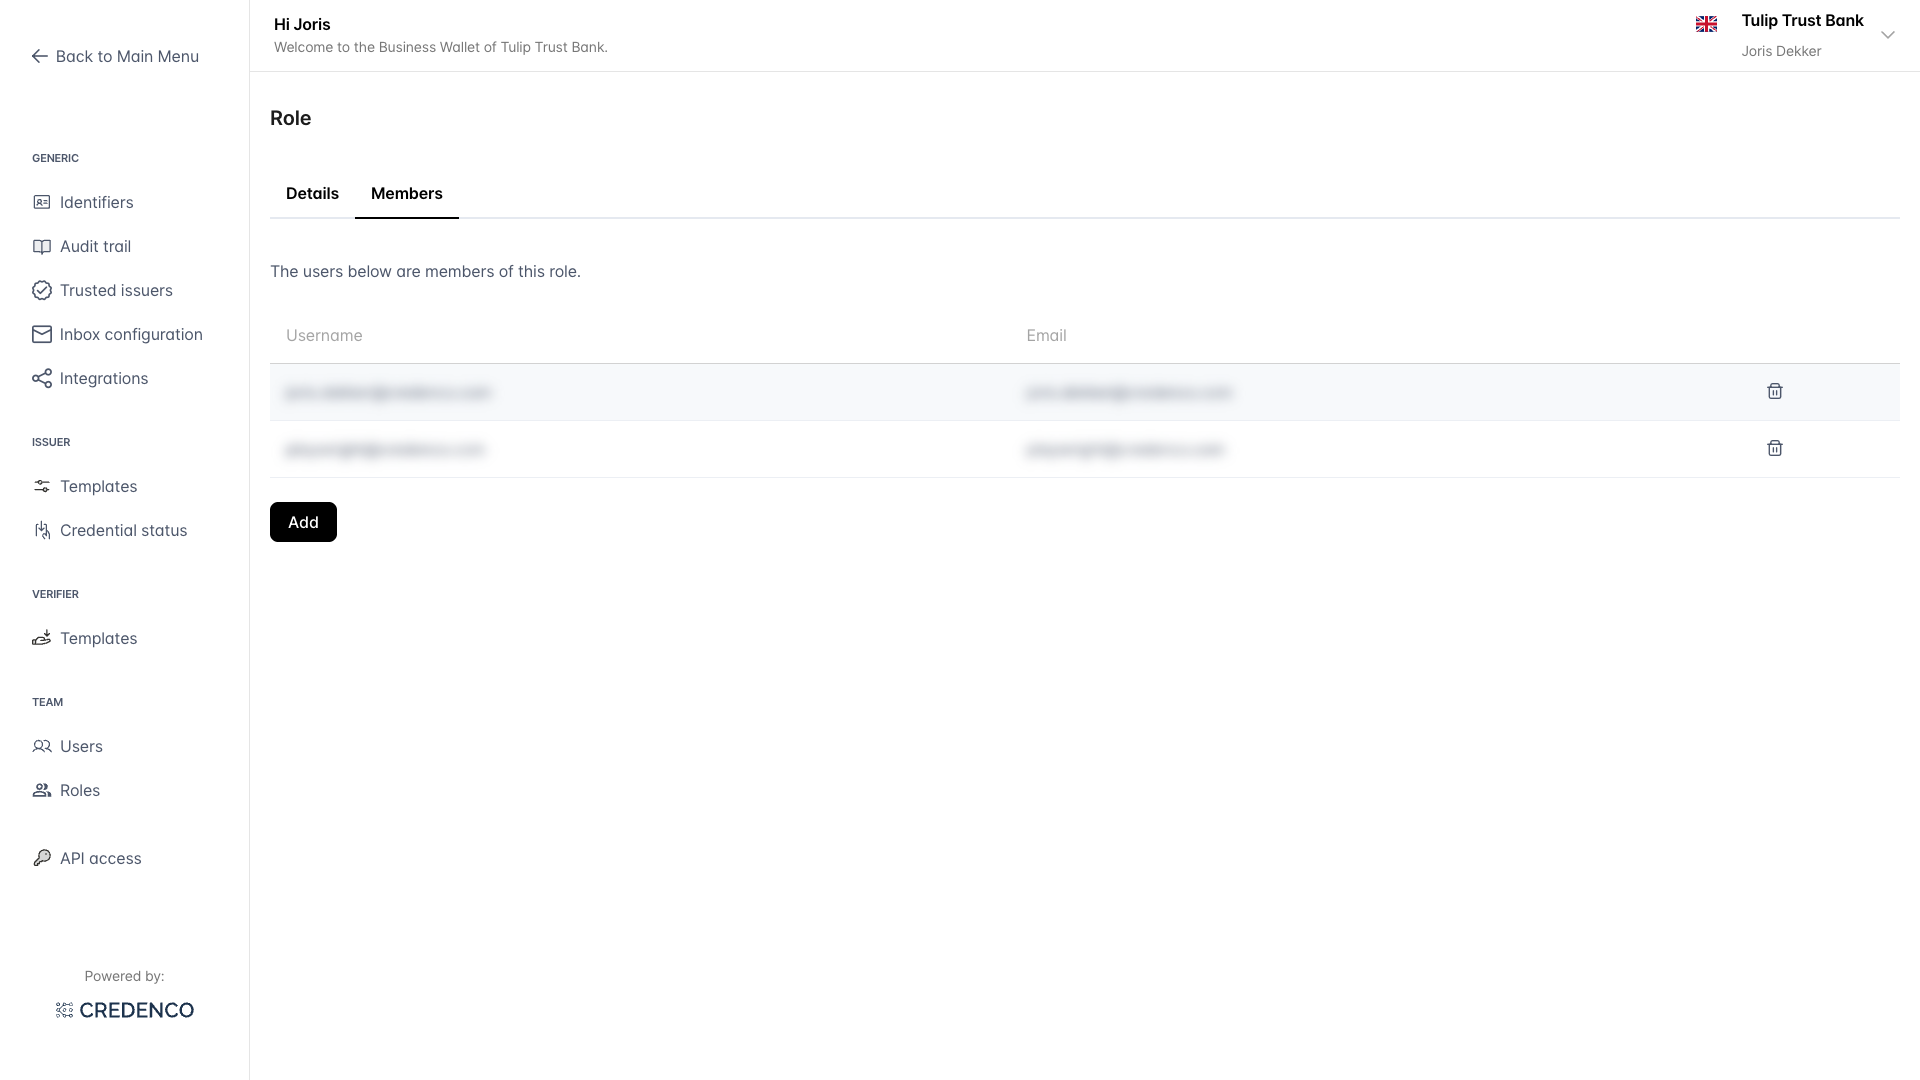
Add a member
- Open a role and click the Members tab.
- Click Add.
- Select the user you want to add to the role.
Remove a member
- Open a role and click the Members tab.
- Click the delete icon next to the user you want to remove.
You can also assign roles to a user from the user form by ticking or unticking the role checkboxes.
Delete a role
- On the roles overview, click the role you want to delete.
- On the Details tab, click Delete in the top right.
- Confirm the deletion when prompted.
Deleting a role removes the associated permissions from all users who were assigned to that role.
Always ensure at least one user has a role with the User management (Change) permission. If no user has this permission, nobody will be able to manage users or roles, and you will need to contact support to regain access.
You need the User management (Change) permission to create, edit, or delete roles. The User management (View) permission allows you to view the roles list without making changes.